Most brands chasing the performance fishing wear market get the product wrong before they ever talk to a fishing wear factory. They pick a fabric by feel. They approve a sample under office lighting. Then they greenlight production on a timeline built around hope, not process reality.
The results are predictable:
Washed-out sublimation prints by six months
Seams that chafe on a twelve-hour offshore run
UPF ratings that don't survive a season of saltwater exposure
All of it is avoidable.
What separates a fishing shirt that earns repeat buyers from one that disappears from the catalog? It's not branding. It's not price point. It's the twenty-three decisions made between textile sourcing and final inspection — decisions most buyers never see, and most suppliers won't bring up on their own. This guide walks through every one of them.
Performance Fabric Construction and Textile Sourcing
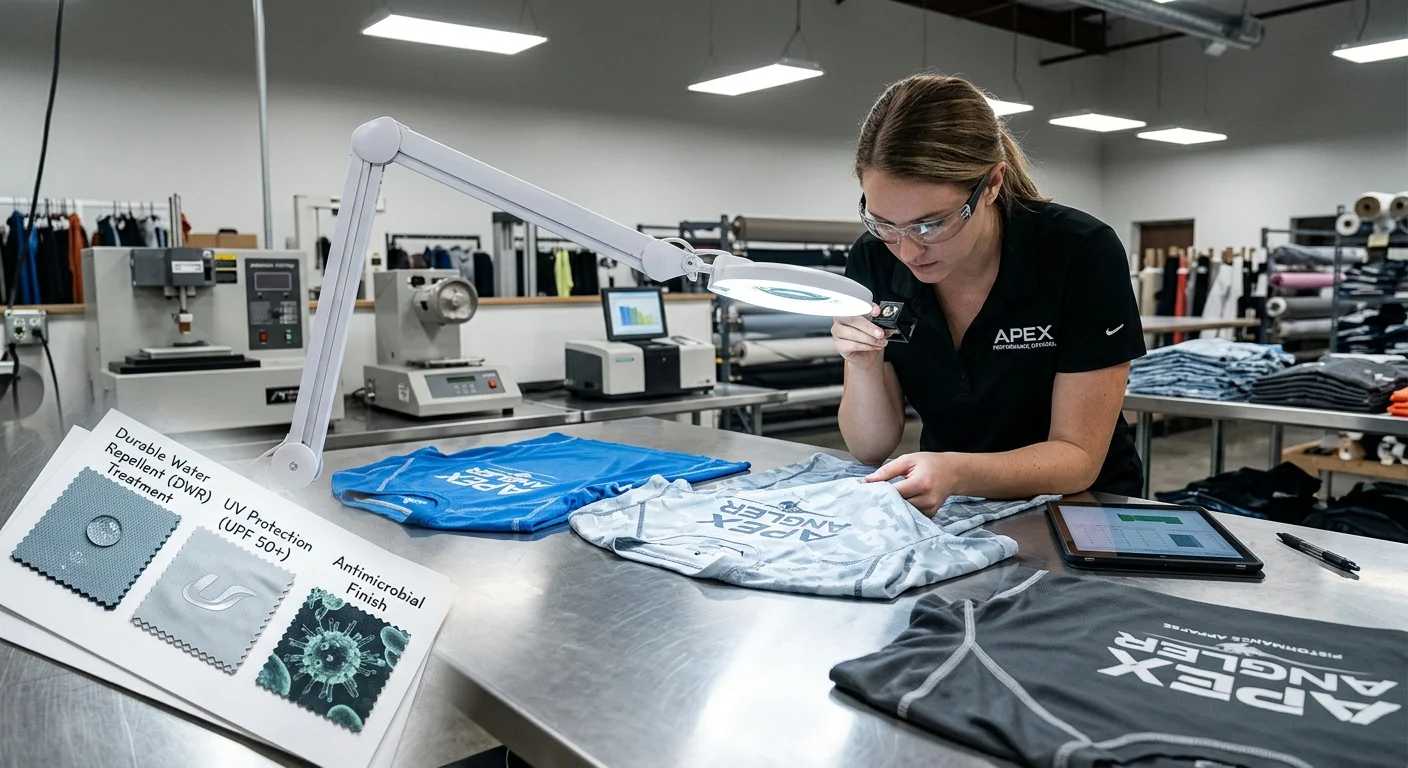
Fabric selection is where the margin gets won or lost — long before a single seam is sewn.
The performance fishing wear market runs on specific technical decisions. Most buyers hand these decisions to the factory too late, or without enough thought. That's a mistake. The factory gives you what they have. Your spec needs to be tight enough that "what they have" becomes irrelevant.
Here's how the construction logic works.
The Fabric Architecture: Three Structural Zones
A well-engineered performance fishing shirt isn't built from one fabric. It's built from three — each mapped to a specific function.
Zone 1 — Main Body Panels
This is the structural workhorse. Microfiber polyester interlock is the industry standard for good reason: double-knit construction, smooth on both sides, high opacity, and a print surface clean enough for sublimation without ghosting or bleed.
Typical spec: 93% polyester / 7% elastane , targeting 140–170 GSM .
This GSM window is deliberate. Drop below 140 and you lose the cover factor needed to hold a UPF 50+ rating . Push above 170 across the full body and you've traded breathability for opacity. Most anglers notice that trade-off by hour four in direct sun.
Zone 2 — Ventilation Inserts
Upper back, underarms, and side panels need a different material. Bird's eye piqué or circular knit mesh structures open the air channel without wrecking the garment's UV profile.
The spec field that matters here isn't GSM. It's air permeability (ASTM D737) . Require test reports. A mesh insert with low porosity does nothing for airflow — it just adds cost.
Zone 3 — Abrasion Zones
Rod butt contact points, pocket openings, elbow reinforcements. Use 85–90% nylon / 10–15% spandex in the 160–220 GSM range. Nylon's abrasion resistance per GSM beats polyester — that's exactly where it earns its place.
Moisture Wicking: Yarn Engineering, Not Just Finish
The moisture wicking fishing fabric conversation gets oversimplified. Most fishing wear suppliers say their fabric is "quick dry." The real question: is that performance built into the yarn structure, or sprayed on as a topical chemical finish? One washes out.
Genuine moisture management runs on a hydrophobic outer / hydrophilic inner principle. The outer face uses hydrophobic filament polyester to resist surface wet-out. The inner structure — through trilobal yarn cross-sections, multi-channel filaments, or engineered capillary spacing — pulls sweat off skin and pushes it outward to evaporate.
Polyester microfiber fishing wear built this way dries 40–70% faster than cotton in controlled comparisons. That gap matters on a twelve-hour boat run.
Your tech pack should specify these three things:
- Yarn type: e.g., microdenier polyester 75D/72F , cationic or standard
- Cross-section or finish type showing capillary efficiency
- Required test reports: vertical/horizontal wicking + dry-time documentation
GSM: The Number Everyone Quotes, the Tolerance Nobody Checks
For quick dry fishing apparel built to UV protective standards, 140–180 GSM is the practical sourcing window for body fabric. Mesh inserts sit at 120–150 GSM .
What the spec sheet won't warn you about: GSM tolerance drift.
Industry-accepted tolerance runs ±5–10% . On a 160 GSM spec, your acceptable delivered range is 152–168 GSM . Rolls that land at 145–148 GSM on a regular basis aren't normal variation — that's a supplier cutting weight on purpose.
The verification protocol: weigh five samples of 100 cm², calculate the mean and range, then document lot-by-lot. Fabric tracking at the bottom of tolerance produces lower actual UPF ratings and faster wear degradation. The supplier's mill cert won't tell you that.
Solution-Dyed Yarns and Saltwater Durability
For anti-microbial fishing clothing and saltwater-exposed garments, solution-dyed (dope-dyed) polyester and nylon are worth a serious look. Color goes in at the polymer chip stage — before fiber extrusion, before knitting, before finishing.
The practical advantages for fishing applications:
- 20–30% reduction in dyeing water and energy vs. conventional piece dyeing
- Strong colorfastness to light and washing — relevant for UV fade resistance and saltwater exposure
- Lot-to-lot shade consistency on repeat orders, since the color lives in the filament, not a dye bath
The trade-off: color decisions lock in earlier in the development cycle. Custom fishing clothing colors need mill-level MOQs of 1,000–3,000+ meters per design . For core fishing colorways — white, pale blue, light gray — this is a solid option for brands running seasonal reorders.
Three Sourcing Mistakes That Surface in the Final Product
Mistake 1: High-density knits without ventilation mapping.
Spec 180–200 GSM interlock across the full garment and you guarantee UPF compliance on paper. You also trap heat and slow dry time in real field conditions. The fix isn't a lower GSM across the board. Use body fabric in the 140–170 GSM range, then add mapped mesh zones at the upper back, underarms, and side panels.
Mistake 2: Trusting nominal GSM without a verification protocol.
Fabric arriving 8–10% below spec on a regular basis is a supplier behavior pattern — not a manufacturing accident. Push back with data, not a phone call.
Mistake 3: Over-customizing at low volume.
For initial runs under 500 units per design , custom fishing clothing GSM and construction specs push up MOQs, stretch lead times, and lock capital in fabric inventory before a single sale confirms demand. Start with high-quality stock performance fabric construction . Customize once the market validates the product.
Pre-Production Testing and Certification Standards
Some brands skip the testing phase, trust the supplier's paperwork, and end up with two thousand garment units that fail UPF certification on arrival. It happens more often than anyone in this industry wants to admit.
Pre-production testing isn't a formality. This is the stage where your marketing claims either earn legal standing or become a liability.
UPF 50+ Certification: The Number Has to Mean Something
A garment labeled UPF 50+ must block ≥98% of UVA/UVB radiation . That claim needs to be verified, documented, and traceable to a specific fabric lot and colorway. It doesn't transfer between dye batches. It doesn't carry over from prototype to production unless you test both.
Two standards govern this:
AATCC 183 — the primary US-market method
AS/NZS 4399 — required for Australian and New Zealand distribution
The testing protocol that holds up in practice:
3–5 swatches per color, per fabric lot — cut from both unwashed greige and finished fabric
Set an internal target of UPF 60–80 at the prototype stage. This gives the production run enough margin to land at 50+ after real-world variation
No bulk cutting until every dyebath combination and finished fabric weight has passed
That buffer isn't excessive caution. Full-scale dyeing and finishing can break down UV-absorbing compounds that worked fine at sample stage. Brands that test at prototype and then skip pre-bulk lot checks are the ones calling their factory in month three about a certification failure.
Colorfastness: Wash, Rub, Salt
For sublimation printing fishing shirts and dyed performance fabrics, colorfastness testing covers three specific failure modes.
Laundering — ISO 105-C06
Run a minimum of 5 wash cycles at the specified temperature and detergent. For fishing apparel with marine exposure, push that to 10 cycles in your own lab protocol. Acceptance threshold: Grade 4 on both color change and staining (on a 1–5 scale, where 5 means no change).
Crocking — AATCC 116
Test dry and wet rubbing on both face and back. Dry rub: Grade 4–5 . Wet rub: Grade 3–4 minimum — pay close attention to dark and bright shades. This matters most where the fabric contacts skin during a long day on the water.
Saltwater immersion
No single universal standard covers this. Build your own protocol. A solid baseline:
24-hour immersion in 5% NaCl solution at room temperature
Re-test colorfastness and UPF after drying
Track ΔE color difference (target ΔE < 2 vs. control)
Confirm UPF holds within 10–15% of original value
Any visible dye bleed, blooming, or coating delamination after the salt soak is a disqualifying result. It's not a note for revision.
Dimensional Stability: The Spec That Disappears After Three Washes
Quick dry fishing apparel built with panel-specific construction — mesh inserts, mapped ventilation zones, four-way stretch panels — has zero tolerance for shrinkage variation. A 4% length change in the body fabric after washing pulls the mesh insert out of position and breaks the seam geometry.
The protocol:
3 washes at 60°C , front-load industrial machine, standard detergent
Mark a 50 cm × 50 cm specimen, measure before and after
Target: < 3% dimensional change in both warp and weft directions
Feed this data into your block grading. Your fabric shrinks 2.5% lengthwise? That number goes into the pattern before cutting — not into a post-production complaint.
Moisture Management Validation: AATCC 195
Stop talking about moisture wicking fishing fabric without numbers to back it up. AATCC 195 (Liquid Moisture Management Properties of Textile Fabrics) is the standard that turns "quick dry" from a marketing phrase into a documented performance spec.
Key metrics your pre-production dashboard should track:
Metric | Minimum Threshold (High-Performance Claim) |
|---|---|
Top wetting time | < 3 seconds |
One-way transport | > 200% |
Spreading speed | Documented per face/back |
Absorption rate | Tied to fiber spec |
These reports must be linked to specific fabric specs and color codes — not filed by style name alone. A retailer's QA team pulling your technical file will need to match test data to the exact lot that went into production. Make sure that's possible.
Chemical Safety Documentation
For anti-microbial fishing clothing and any garment with functional chemical finishes, the documentation chain runs through three checkpoints:
OEKO-TEX Standard 100 certificates from fabric and trim suppliers — check that article numbers match your actual materials, not a generic product category
MSDS for every dyestuff and finish , with a clear declaration that colorants are free from banned arylamines, azo dyes, and heavy metals per EU REACH and CPSIA
RSL clearance for all functional finishes — antimicrobial agents, DWR coatings, UV absorbers
Class I or Class II certification under OEKO-TEX depends on end use. For next-to-skin fishing apparel, Class II is the minimum. Check certificate validity dates — a certificate issued eighteen months ago may not cover your current production lot.
The Two Pre-Production Failures That Kill Batches
Skipping lot-level UPF testing after prototype approval.
The prototype passed. Then the bulk dye run used a different mix of auxiliary chemicals, or the finishing temperature drifted, or the fabric weight came in 8% low. Now the garments don't meet UPF 50+. At that point, the fix is reprocessing or scrap — neither is cheap. Build mandatory pre-bulk lot testing into your fishing apparel supplier contract. Include clear rework obligations for results that don't meet spec.
Incomplete technical file traceability.
Test reports that can't be mapped to specific fabric IDs, color codes, and production lot numbers won't satisfy regulatory frameworks that require traceability. The fix is structural, not a paperwork patch. Maintain a BOM per style. Map test reports to each material and color. Organize certification copies by lot. Attach factory QC records to every pre-production inspection.
The technical file isn't bureaucracy. It's the evidence base that makes your UPF 50+ sun protection clothing claim defensible — in a retail audit, a regulatory review, or a product liability conversation.
Technical Pattern Drafting and Prototyping Workflow
The pattern is where intention becomes geometry — and where most technical fishing shirts fail before the first sample gets sewn.
Getting this stage right means building a digital base pattern that accounts for how a body moves on water. A CAD-drafted block isn't just a shape. It's a set of decisions locked into the file: seam allowances, grainlines, notch positions, panel boundaries. Each decision either supports the fishing-specific fit requirements down the line, or fights them.
The tech pack is your contract with the factory. For a performance fishing shirt, it needs to specify more than most activewear packs include:
Stitch density by seam location — 8–10 SPI on side seams and armscye; 10–12 SPI on collar, cuffs, and plackets
Thread specification — 40/2 or 20/2 polyester core-spun for high-stress seams (Tex 27–40); finer Tex 18–24 for topstitching
Seam type per location — flat-felled side seams, mock-fell sleeve seams, overlock plus coverstitch at the hem
Measurement tolerances at every POM — body length ±0.25", chest ±0.25", sleeve length ±0.25"
Vague specs produce vague samples. A factory filling gaps with its own judgment defaults to what's easiest to produce — not what performs best at the rod.
Engineering Mobility Into the Block
Three pattern features separate a fishing shirt from a regular button-down. Draft, measure, and validate each one before bulk production.
Articulated sleeves use multiple panels — upper and lower sleeve with a back-elbow seam or dart, extra ease at the posterior elbow, and reduced excess at the front. The POMs that matter here: elbow circumference, bent-arm sleeve length, and forward reach across the back. Your pattern needs these measurements defined. Without them, your factory has no way to confirm the sleeve is doing its job.
Gusseted underarms — a diamond or triangle insert between body and sleeve — need a width of 2–3 inches at the widest point for a midweight shirt in sizes M–L. Track gusset length front and back, gusset width, and armhole circumference with the gusset in place. These aren't decorative details. They're what lets a fisherman execute a full overhead cast without the shirt pulling across his shoulders.
Vented back mesh panels require a vent opening of 4–6 inches in height. Map the vent to shoulder blade motion. Add 1–2 inches of ease across the back at the yoke seam compared to a standard dress shirt.
The Prototype Progression
Three sample stages. No shortcuts.
Muslin or low-fidelity proto — check shape and fit, nothing more
Mid-fidelity prototype — full feature set, production-intent construction, lower-cost stand-in fabric
Pre-production sample — production fabric, final specs, the sample that triggers bulk authorization
Between each stage, update your fit notes, revise the pattern file, and log measured values against digital targets in your POM table. Documentation isn't optional here. It's the audit trail that keeps pattern corrections traceable and stops the factory from reverting to an earlier version.
Fit testing must happen in casting positions — not standing still in a sample room. A deep squat checks hem and back length behavior. An overhead cast tests shoulder, sleeve, and gusset function all at once. Seated in a boat checks front placket tension and hip ease. All three positions need to appear on your fit review sheet. Miss them, and the prototype hasn't been tested for its actual use case.
The Pattern Mistake That Shows Up in the First Wash
Grainline discipline matters more in cut-and-sew production for technical fishing wear than most brands expect. Mark the grainline reference on the inside of front, back, and sleeve pieces. Photograph each piece before and after a wash cycle. Track sleeve rotation angle — anything beyond 5° from the original grainline points to a cutting or pattern alignment problem that gets worse over time.
One failure mode is worth calling out by name: taking a standard knit activewear block and dropping it unchanged onto a low-stretch woven marine-grade fabric. The armhole ease and sleeve geometry are built for stretch recovery that simply doesn't exist in the new material. The result? Seam puckering along the armscye, restricted mobility in overhead-cast positions, and a prototype that passes a static measurement review but falls apart in the field. The fix is running an early proto in production-intent fabric — not scrambling for a last-minute adjustment at the PP stage when the factory is already booking cut time.
Precision Marker Making and Automated Cutting
Fabric waste doesn't announce itself. It builds up in every inefficient marker, every misaligned notch, every ply spread without checking actual roll width against the CAD assumption.
Manual marker making runs at 75–80% fabric utilization . CAD-assisted nesting (Gerber, Optitex) pushes that to 82–87% . AI-integrated predictive placement reaches 88–94% . That gap isn't academic. Take a factory cutting 1,000 meters per day. Moving from manual to AI nesting saves 100–150 meters per day — that's USD 540,000–810,000 per year at standard polyester microfiber pricing.
For performance fabric construction with directional four-way stretch, the marker isn't just a nesting puzzle. Lock grainline orientation and stretch direction before you build bulk markers. Skip that step and you get asymmetric hemlines and flatlock seams that track off-axis. These defects won't show up in static QC — but they're obvious after one cast.
Two controls you must have in place before automated cutting starts:
Layer height : Cap spread at ≤5 cm for tension-sensitive performance knits. This prevents bias distortion across plies.
Registration tolerance : Hold ±1 mm on notches and match points. This is mandatory for sublimation-aligned graphics where front-to-back motif continuity is part of the product spec.
Mix 4–6 sizes per marker . Verify actual fabric width from the storeroom roll — not the mill cert. Feed shrinkage data into the marker yield before you commit to a cut order plan. The marker that worked on your prototype lot may not hold on bulk fabric that arrived 3% narrower.
Dye Sublimation Apparel Process and Color Fastness Control
Sublimation printing fishing shirts fail in a specific, predictable sequence. The colors look saturated on approval samples. The factory ships on time. Six months later, a customer posts a photo — washed-out chest graphics, muddy marines, a logo that looks like it lost an argument with the sun. Nobody mentions the press parameters. Nobody mentions the humidity log. That's where the failure started.
Here's what controls color longevity on a performance fishing shirt.
Press Parameters: The Numbers That Decide Color Depth
Sublimation dye doesn't sit on polyester fiber — it moves inside it. The transfer window is narrow. Every variable matters.
For elastic performance knits (93% polyester / 7% elastane, the construction specified in the fabric section):
Temperature: 195–205°C . Below 190°C, dye diffusion is incomplete. Colors read flat and wash out fast. Above 210°C, fiber yellowing begins and spandex degrades.
Dwell time: 45–60 seconds. Full microstructure penetration needs time, not just heat.
Pressure: 0.6–0.9 bar (≈9–13 psi). This is the number most factories get wrong. Over-pressing elastic knits compacts the loop structure. The garment prints well — but it loses breathability and 4-way stretch recovery. Both are fatal for a performance fishing shirt.
For calender roll production on fishing apparel: hold 195–205°C, 45–60 seconds, 0.6–0.9 bar and calibrate roll tension at 0.8–1.2 N/mm² . Too loose gives you slippage and ghosting. Too tight flattens the knit's capillary channels — the same channels doing the moisture wicking work.
Ghosting: The Defect That Hides Until Production Scale
Ghosting shows as a double-shadow or smeared edge on high-contrast marine graphics — dark navy against white panels, brand logos on chest pockets. It's nearly invisible on dark-field designs and hard to miss on everything else.
Three causes. Three controls.
Cause 1 — Residual fabric moisture. Polyester-blend knits absorb ambient humidity. Condition rolls at 40–45% RH for 24 hours before printing. Add a 5–10 second pre-press at target temperature, light pressure to push out trapped moisture before the transfer. Skip this step and steam forms under the paper during the press cycle. The ink shifts sideways before it can bond into the fiber.
Cause 2 — Paper or fabric movement. Secure transfer paper at corners with heat-resistant tape. No tape over the design area. For calender operations with persistent ghosting, raise roll tension to 2.5–3.0 N/mm² as a corrective measure. Check that the knit structure hasn't flattened before accepting the fix.
Cause 3 — Premature peel. Wait ≥30 seconds before pulling the transfer paper after the press cycle finishes. Peeling hot drives ink migration and destroys edge definition on detailed fishing logos.
Color Management for Marine Palettes
Fishing apparel works within a specific color range — saturated cyans, deep ocean blues, sun-bleached greens, and high-contrast whites. Standard sublimation ICC profiles don't cover this gamut well.
The working protocol:
Design in CMYK, not RGB. RGB-to-sublimation conversion produces muted, undersaturated results on marine colorways. It's a consistent problem.
Build printer–paper–ink–fabric-specific ICC profiles that target the deep blues and saturated teals your fishing patterns use. A generic profile cuts color depth on the shades that matter most.
Print at 150–200 DPI at final size. Below 150 DPI, edge definition breaks down. Fishing logos and scale-pattern graphics show visible stair-stepping.
Hold ΔE variance ≤1.0 run-to-run. Hitting ±0.5 ΔE needs tight environmental control: temperature ±2°C , dwell time ±2 seconds , humidity held at 40–45% RH . These aren't aspirational tolerances. They're what separates a consistent reorder program from a supplier conversation about "slight color variation."
Color Fastness Verification: The Tests That Matter
The process control checklist for sublimation printing fishing shirts runs through four verification points before bulk authorization.
Rub fastness — ISO 105-X12
Under-cured inks bleed under friction — more so on stretch fabrics that take repeated surface contact during fishing. Target: Grey Scale Grade 4 or higher on both dry and wet rub. Run this test on every new color combination. Don't save it for the seasonal proto stage.
Wash fastness
Run 3–5 home-launder cycles at low heat. Check color loss and hand feel. Ban bleach, fabric softeners, and high-heat tumble dry — put it in your care label and your factory QC protocol. Each of these degrades sublimation brightness in ways the pre-production wash test won't catch. Especially if you run the test right but then get the care label wrong.
Xenon arc lightfastness
For UV-heavy marine use, run a 24-hour xenon arc exposure as an accelerated lightfastness check. Target: minimal visible fading, ≤ Grade 4 on the blue wool scale equivalent. UV exposure is the primary color degradation driver for fishing apparel in the field — not washing frequency. That's what makes this test important.
Saltwater interaction
Pull the saltwater immersion protocol from the pre-production testing section. After the 24-hour NaCl soak, re-check color loss on sublimated panels. Any dye bleed or visible color shift beyond the ΔE threshold is a failure. Sublimation dye that has bonded fully inside the fiber structure stays inert to saltwater. If it doesn't, the press parameters weren't right.
The Breathability Trade-off Nobody Documents
There's one failure mode in the sublimation process that color fastness tests won't catch. You find it in field returns instead.
Over-pressure during transfer — or too much ink pushed into high-porosity mesh inserts — blocks the capillary pathways inside the knit. The garment passes every color test. It also stops wicking moisture. The quick-dry claim is still supported on paper by the base fabric spec, but the press process has partially blocked the microstructure doing the actual work.
The fix is structural documentation — not a press adjustment after the fact. Log pressure settings per fabric zone. Run AATCC 195 moisture management testing on printed production swatches , not just greige or unprinted fabric. The wicking spec should clear on the finished, sublimated product — not just on the fabric before it goes through your process.
Cut and Sew Garment Production and Flatlock Seam Execution
The cutting room is where the spec sheet becomes a garment. Most decisions that shape seam quality happen three stages before the sewing room even starts.
The production flow runs in one direction with no room for error: fabric inspection → spreading and marker lay → cutting → numbering and bundling → sewing → pressing and finishing → final check and packing. Every station passes its quality to the next. A misaligned notch from cutting creates a tracking problem on the flatlock machine. A flatlock machine running the wrong needle size for a 150 GSM stretch knit becomes a performance failure on the water.
The Sewing Room Machine Stack
Cut and sew garment production for performance fishing shirts needs four core machines at minimum:
High-speed single-needle lockstitch — general construction, plackets, collar attachment, cuff joining
4-thread overlock / serger — edge finishing and seam formation on all stretch panels
Flatlock machine — low-profile joining on side seams, shoulder seams, and underarm gussets
Bartack machine — reinforcement at every stress point: pocket corners, gusset anchors, placket base
Match each machine to fabric type and stitch type before the line runs. On polyester microfiber fishing wear at 140–170 GSM, the wrong needle size doesn't create a minor defect. It creates visible seam distortion that no pressing step can fix.
Flatlock Execution: Why It Matters for Performance Fishing Wear
Flatlock seam sportswear construction solves two real problems in a twelve-hour fishing session: seam profile and skin contact.
A conventional overlock seam leaves a raised ridge on the inside of the garment. On a woven casual shirt, that ridge doesn't matter. On a moisture-wicking stretch shirt worn against bare skin for an entire offshore run, it becomes a pressure point. Given enough time, it turns into a chafe line.
Flatlock joins two fabric panels so the seam lies flat on both faces. No ridge. No bulk. The stitch interlocks across the cut edges instead of wrapping around them. This spreads tension across a wider area. For quick dry fishing apparel built with four-way stretch panels, flatlock also keeps stretch recovery working across the seam. A conventional serged seam fights the fabric's natural movement and snaps back with uneven tension.
Critical execution parameters:
Use stretch-appropriate thread — 100% polyester corespun, Tex 18–24 for flatlock on lightweight performance knits
Match needle gauge to fabric weight. A needle too coarse for 150 GSM microfiber punches holes rather than passing cleanly through the loop structure
Run a tension test on a fabric swatch before locking in production settings. Flatlock tension set for woven fabric will pucker on a knit with 20% spandex content
Bartack Reinforcement: The Detail That Extends Garment Life
Bartacking isn't a cosmetic step. On a performance fabric construction built for rod work and marine conditions, stress concentrates at four points: pocket openings, gusset anchor points, placket base, and the sleeve-body junction at the underarm.
At each of these points, a standard seam isn't enough — even a clean flatlock. A bartack machine lays down a dense, short zigzag reinforcement stitch across the end of the seam. This spreads the mechanical load across a wider stitch field. You get a seam endpoint that holds under directional stress — the kind that comes from a full overhead cast, repeated rod retrieval, or a full day pulling line under load.
Call out bartack placement in your tech pack. Leave it to default factory practice and bartacking gets applied unevenly — or dropped entirely at lower-tier facilities running tight cycle times.
Functional Finishing and Performance Enhancement Treatments
The garment leaves the sewing line looking right. Seams flat. Graphics sharp. Every spec confirmed on paper. Then it meets saltwater, UV load, and a fisherman who doesn't rinse his gear for three days straight — and the chemistry either holds or it doesn't.
Functional finishing is where performance fishing wear earns its technical claims. It's also where brands most often over-promise and under-specify.
Antimicrobial Finishing: Chemistry First, Marketing Second
Not all antimicrobial treatments perform the same way. The difference shows up clearly by wash twenty.
Topical quaternary ammonium (QAC) finishes are the entry-level option. One machine wash removes 30–60% of surface QACs. After five cycles, residual activity drops below the 70% reduction threshold that AATCC TM100 defines as meaningful. For a fishing shirt exposed to bait, sweat, and sun, that's too short a lifespan.
Silver-ion integrated systems are the spec worth building to. Platforms like Polygiene, Silvadur, and Sanitized® hit ≥99.9% bacterial reduction and hold that performance past 40–50 wash cycles . Sanitized® silver finish, as one documented benchmark, retains >98% efficiency after 50 industrial washes at 60°C .
The mechanism matters. Silver-ion embedded in a polymer matrix during fiber extrusion survives dyeing, finishing, and repeated laundering. Ceramic-carrier silver fabric holds >90% of original antimicrobial efficacy after 25 washes , with odor scores staying near a clean baseline.
Application protocol for polyester knit fishing shirts:
- Dip-padding at 60–80% pick-up , followed by thermal curing at 150–160°C with minimal binder add-on
- Or use exhaustion or spray application on continuous finishing lines
- Target spec: ≥99% bacterial reduction (AATCC 100 / ISO 20743) after 20+ home wash cycles as the minimum; 40–50+ washes for offshore-grade product claims
One warning here. Strong binder systems that deliver wash durability can also fill the micro-pore structure that makes moisture wicking work. The finish keeping the garment odor-free through fifty washes must not be the same finish blocking the capillary channels that drive quick-dry performance. Keep total chemical add-on below 5–8% owf on lightweight wicking knits. Also, validate AATCC 195 moisture management performance on finished, treated garments — not on greige fabric before finishing enters the picture.
DWR Finishing: Spray Rating Targets and Application Controls
Durable water repellency (DWR) on a performance fishing shirt isn't about standing in rain. It's about shedding spray on the bow, staying dry through a chop crossing, and not carrying absorbed water weight through a twelve-hour session.
Performance targets for fishing applications:
- AATCC 22 spray rating ≥90 at the start
- Hold ≥80–90 after 10–20 wash cycles for premium offshore gear
- Standard outdoor specs require ≥90 after 5–10 washes as a baseline
C6 fluorinated DWR has long been the benchmark for high ratings at low add-on. Non-fluorinated options — paraffin, polysiloxane, hyper-branched polymer systems, and sol-gel matrices — now reach 90–99% spray rating with cleaner chemical profiles. Some combined non-fluorinated systems add antimicrobial benefits alongside water repellency. That cuts the number of sequential finishing steps you need.
Application method drives the outcome on lightweight fabrics:
- Knife-coating or spray for shell fabrics and laminated membranes — delivers localized high add-on without saturating the base layer structure
- Controlled padding at 40–60% pick-up for wicking knit shirts — lower pick-up stops pore clogging and keeps weight down
- Post-cure on stenter frames at 150–180°C for 60–90 seconds , based on resin chemistry
Dimensional Finishing and UPF Treatment Stability
The stenter frame does more than set width after dyeing. For UPF 50+ sun protection clothing , it's the step that locks chemical UV absorbers into the fabric matrix.
Heat-setting polyester fishing knits at 180–200°C with a 30–60 second dwell time handles three things at once. It controls shrinkage for cut consistency, calibrates GSM and fabric skew for your marker plan, and drives crosslinking of UV-absorbing agents into the fiber-binder matrix. That crosslinking extends wash durability of the UPF rating. It's the difference between a garment that holds UPF 50+ through 20 washes and one that degrades by wash five.
Your durability verification protocol for the full finishing stack:
Treatment | Standard | Minimum Spec | Preferred Spec |
|---|---|---|---|
Antimicrobial | AATCC 100 / ISO 20743 | ≥90% after 20 washes | ≥99.9% after 50 washes |
DWR | AATCC 22 | ≥90 after 5–10 washes | ≥80–90 after 20+ washes |
UPF retention | AATCC 183 / AS/NZS 4399 | UPF 50+ after 20 washes | UPF 60+ buffer at prototype stage |
Run all three checks on production-finished garment swatches — not separate fabric samples from each finishing stage. Stacked antimicrobial, DWR, and UV treatments interact with each other. Those interaction effects can suppress performance in ways that single-chemistry testing won't catch.
End-of-Line Inspection and Performance Testing Protocols
A garment can pass every upstream checkpoint — correct GSM, clean flatlock seams, verified sublimation parameters — and still fail the buyer at the dock. End-of-line inspection is where that gap gets closed. Or doesn't.
The sampling framework that holds up in professional QC contracts: ISO 2859-1, single sampling plan, General Inspection Level II, normal inspection . Defect limits are fixed:
Critical defects : AQL 0.0 — zero tolerance, no exceptions
Major defects : AQL 2.5 — the worst acceptable rate for functional failures
Minor defects : AQL 4.0 — cosmetic issues, nothing more
For a 2,000-piece lot at AQL 2.5: pull 50 pieces first. Two or fewer defects — accept. Eight or more — reject. Three to seven defects trigger a second pull of 75 pieces. Total defective at or below seven accepts the lot. Eight or above rejects it.
Functional Go/No-Go Tests
Dimensional measurement alone won't catch performance failures. Four functional checks belong on every end-line inspection sheet for performance fishing wear:
Zipper pull strength : minimum ≥15 N on a tensile tester. Any slider or pull tab that detaches below that threshold counts as a major defect against AQL 2.5. Not a cosmetic note.
Hardware corrosion verification : expose metal snaps, eyelets, and zipper sliders to 5% NaCl solution mist for 24 hours . Post-test criteria are binary — no red rust, no pitting on visible surfaces, no functional sticking. Any failure tightens inspection on the lot.
Mesh panel integrity : run a firm manual pull along every seam and across ventilation inserts. No tears, no seam slippage, no hole growth. Any hole over 2 mm is a major defect.
Dimensional audit : measure all critical POMs on at least 5 pieces per size-color using calibrated digital tape. Tolerance is ±0.5 cm on chest, body length, and sleeve. More than 10% of measured points exceed that threshold? Classify as major and run AQL 2.5 on lot acceptance. Also use a "golden size set" to calibrate your inspection staff — not just your tools.
Metal Detection and Packing Controls
Every finished garment goes through a conveyor metal detector before polybagging — 100%, no exceptions. Check sensitivity at shift start and every 2–4 hours using 1.0–1.5 mm Fe test wands . Any alarm stops the line. Pull the affected pieces, re-inspect them, and re-pass them before they rejoin the pack flow. Metal fragments are critical (AQL 0.0) — the same category as a UPF certification failure.
Packing damage is less dramatic but just as costly. Aggressive vacuum packing on laminated or coated performance textiles creates permanent creasing along fold lines and micro-cracking in functional coatings. UPF surface treatments and moisture-management finishes both depend on controlled yarn geometry. Compress them hard enough and the finish breaks down at the fold — even if the garment scans clean at every other point.
Shipping performance fishing wear through humid transit lanes? Put a desiccant sachet inside each polybag . It's a small line-item cost. Skip it and you risk hardware corrosion and coating degradation before the product ever hits the retail floor.
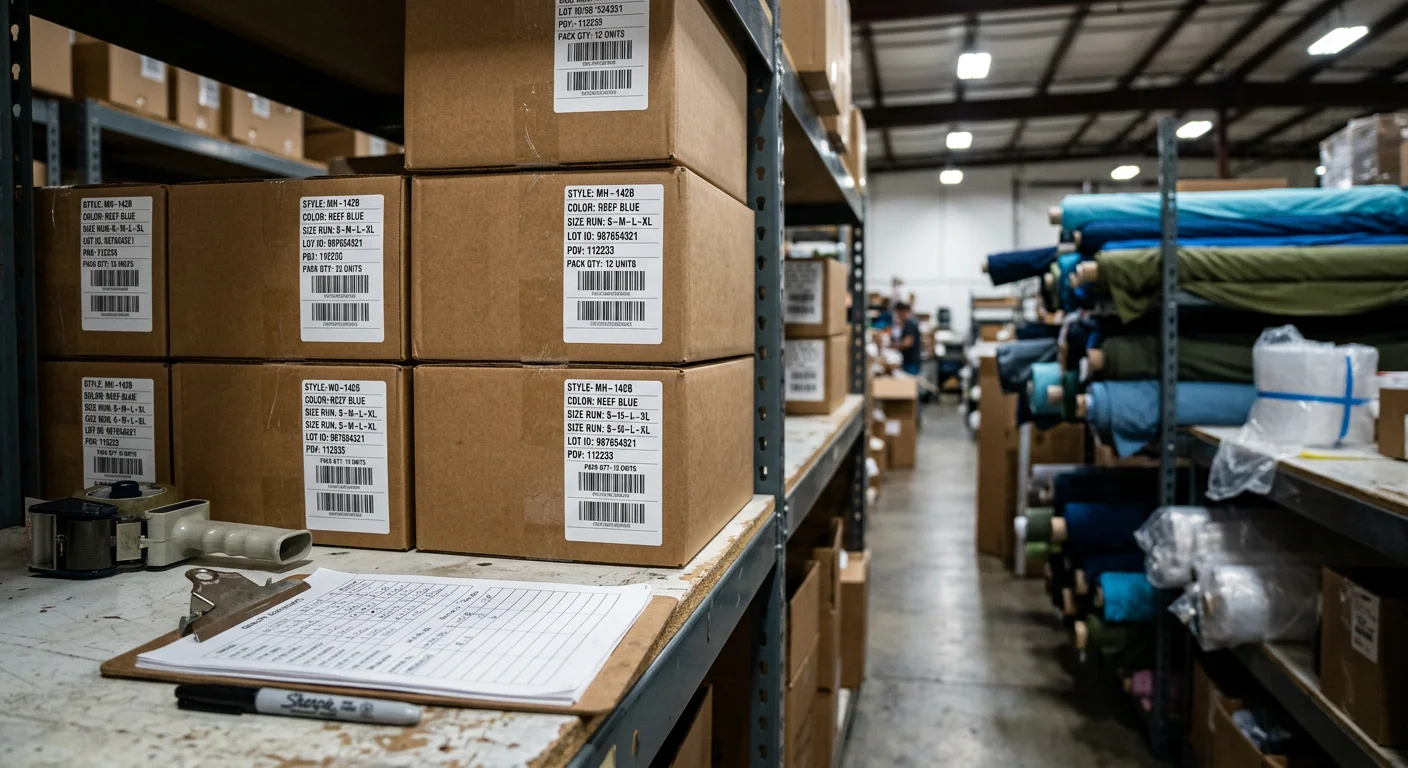
Mark every carton with style, color, size run, PO, and lot ID . The technical file traceability built during pre-production testing means nothing if the physical product can't be mapped back to it. A carton without a traceable lot ID breaks that chain at the final step — and that's the worst place for it to break.
Supplier Capability Assessment and Verification Framework
A Performance Fishing Wear supplier who can't show you their machine list isn't a supplier — they're a middleman with a brochure.
Real production capability comes down to verifiable evidence, not sales calls. One factory delivers 2,000 performance fishing shirts on spec. Another ships 2,000 problems. The difference is what you can confirm before placing the order.
Start with capacity math. Suppliers running at 60–80% utilization are in the safe zone. At 90%+, your order competes with everyone else's. It loses ground through skipped QC steps and rushed finishing runs — not through any obvious failure.
The minimum evidence pack worth requesting:
Factory profile with monthly output by line
Machine list including model, age, and maintenance records
Current ISO 9001 certificate — treat this as baseline, not a bonus
BSCI or Sedex social audit evidence with corrective-action history
OEKO-TEX/GRS certificates matched to your actual fabric set
Recent AATCC/AS/NZS test reports for UPF and colorfastness — tied to the exact construction being quoted, not a generic style
PPS, fit sample, and PSS approvals with corresponding lab data
Last 6–12 months of defect rates, on-time delivery records, and CAPA documentation
For technical fishing apparel, check that the production floor runs automated spreading and cutting , climate-controlled sublimation rooms , flatlock stitching arrays , and stenter finishing capability . A supplier missing any of these isn't built for performance fishing wear. They're built for basics — just with premium-sounding claims.
Two benchmark numbers to hold suppliers against: 300–500 pcs per color as a working MOQ for custom fishing apparel programs, and 45–60 days FOB from a finalized tech pack. A supplier quoting 30-day turnarounds on a first custom order needs a deeper capacity audit — not a purchase order.
Walk the floor. Watch where in-line QC stations sit. Watch how defects get pulled and logged. A factory built for technical fishing apparel looks different from one running sample work and outsourcing bulk production. That difference shows up in twenty minutes — as long as you know what to look for.
Conclusion
Every stitch tells a story. In performance fishing wear, that story starts long before the first thread is sewn.
What separates a shirt that survives a full season of saltwater, sweat, and relentless sun from one that fails after three washes? It's not luck. It comes down to a chain of deliberate decisions:
The 150–180 gsm polyester microfiber you select at sourcing
The sublimation press calibrated to 202°C
The flatlock seam that moves with a cast instead of fighting it
These aren't just manufacturing details. They're competitive advantages — invisible to the end customer, but felt in every wear.
For brand founders and B2B buyers, the real takeaway is simple: knowing the process is knowing the product. Walk into a factory. Ask the right questions — about UPF 50+ certification methods, anti-microbial treatment durability, or cut and sew tolerances. That's what separates a buyer from a true partner.
That shift changes everything.
Ready to move from research to production? Start with the fishing wear manufacturer assessment framework — and bring your spec sheet.