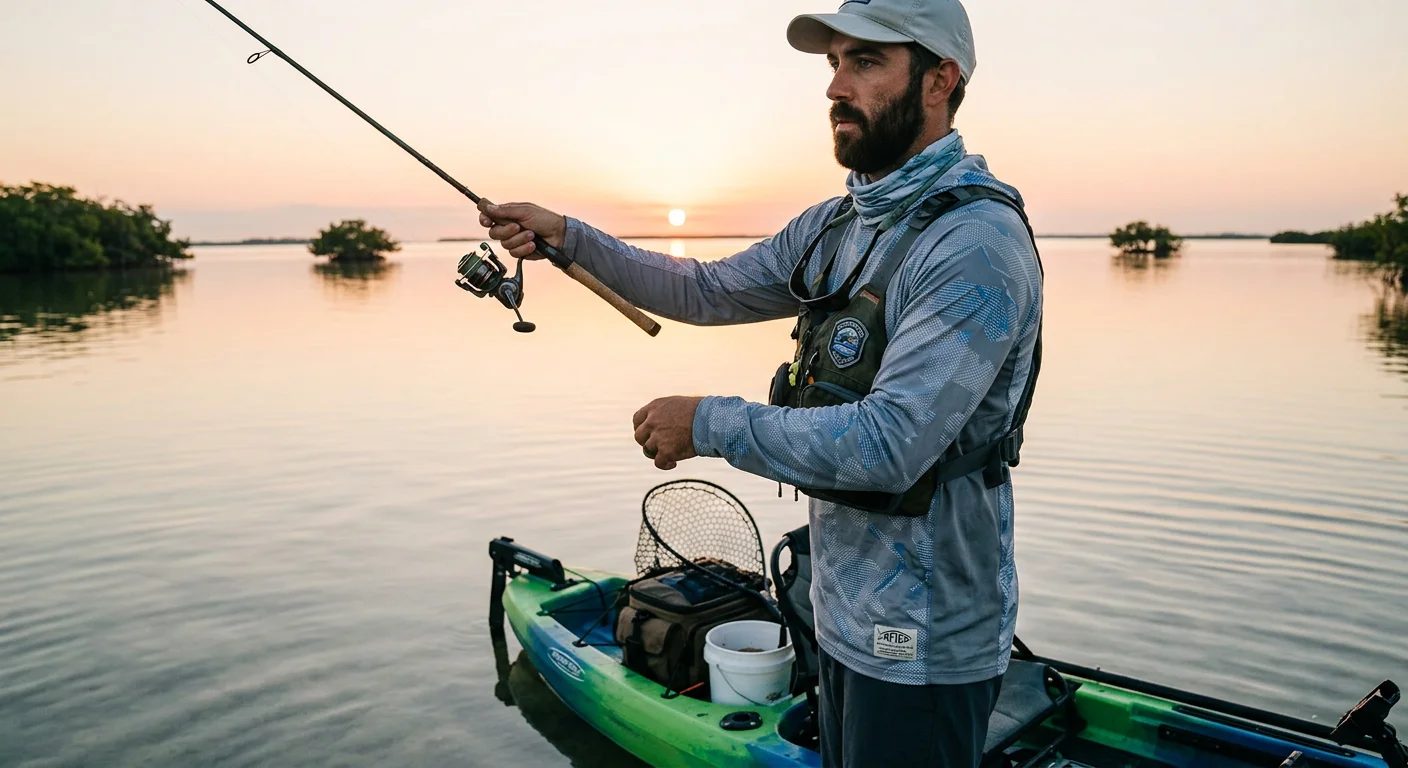
Your fishing shirts take a beating most branded apparel never sees — salt spray, relentless UV, and back-to-back tournament days where the fish are the only ones getting a break.
Putting your logo on performance gear raises the stakes. It's not just about what looks good on a mockup.
The wrong decoration method on moisture-wicking polyester does real damage. It peels mid-season. It puckers the fabric. It destroys the technical properties you paid a premium for.
This guide skips the generic embroidery-vs-heat-transfer debate. Instead, it gets specific — by garment type, by order size, by the real field conditions your logo will face.f
By the end, you'll have a clear decision framework. No guesswork. No wasted samples.The same framework also helps brands develop custom fishing apparel that performs as well as it looks.
Custom Fishing Tournament Shirts & Sun Hoodies: Logo Application Guide
Tournament day means at least six hours in direct sun. Salt air works into every seam. The boat deck turns into an oven by noon. Your logo placement needs to account for all of that — not just what passes on a print approval form.
Here's the rule we've seen hold up across every fishing performance shirt and sun hoodie in the field: embroidery owns the front, heat transfer owns the back.An experienced fishing apparel manufacturer should recommend logo methods based on fabric construction, not preference. Here's why — and how to execute it.
Front Identity Logos: Embroidery, Small, Precise
Left chest is where team identity lives. For tournament shirts and sun hoodies, keep your embroidered logo 3–4 inches wide (7.5–10 cm) — no bigger.
Vertical placement: 3–4 inches below the collar seam
Horizontal placement: 4–6 inches left of center, sitting over the heart
That size limit has a real reason behind it. Lightweight UPF 50+ polyester and poly-spandex performance knits are thin and flexible. High-density embroidery stiffens the fabric panel. A 5-inch filled logo on a 4-oz moisture-wicking jersey creates a rigid patch effect. That disrupts airflow and causes puckering after 10–15 washes. Stay at 3–4 inches , use medium stitch density , and you preserve both the garment's technical performance and the logo's clean edge.
Secondary sponsor marks — right chest or outer sleeve — follow the same logic. Keep them 2.5–3.5 inches wide , with structured placement near seams or sleeve caps. Don't float embroidery across open knit panels mid-sleeve. It won't hold up.
Back Graphics & Large Sponsor Art: Heat Transfer Only
The back panel of a fishing tournament shirt is prime visual space. Fish illustrations, topographic charts, large sponsor art — the back is where bold storytelling lives.
It's also where embroidery breaks down.
Dense stitching across a back panel adds heat mass right where a vented sun hoodie needs to release it. It blocks the knit's breathability. On a Florida tournament day in July heat, that's not just a cosmetic issue — it's a wearability problem that affects performance.
DTF transfers, TPU, or silicone heat press applications are the right choice here. Use them like this:
Width: 10–12 inches for adult tournament shirts, scaled by garment size
Top edge: 3–4 inches below the collar, centered across the back
Side margins: maintain 1–2 inches from side seams — no wraparound
Method: DTF for photographic multi-color art; TPU/silicone for stretch-heavy applications on poly-spandex blends
DTF and quality PU transfers flex with the knit during casting motion. They add minimal weight. Plus, they reproduce gradient fish scales, water reflections, and sponsor color systems with detail that embroidery thread can't match.
Sleeve & Shoulder Yoke Placement
Sleeve logos — boat names, tournament flags, small sponsor marks — work in either embroidery or small heat transfer. Keep them 2–3 inches tall, 3–4 inches wide , positioned at the outer sleeve midpoint between shoulder seam and hem.
For shoulder yoke embroidery, stay within 2.5–5 inches wide and anchor the design close to the seam structure. Lightweight performance fabric has no structural support across open yoke panels. Embroidery weight will cause it to sag.
The Quick-Reference Parameters
Zone | Method | Width | Placement |
|---|---|---|---|
Left chest identity | Embroidery | 3–4 in (7.5–10 cm) | 3–4 in below collar, 4–6 in from center |
Right chest / secondary sponsor | Embroidery or small DTF | 2.5–3.5 in | Mirror of left chest |
Outer sleeve | Embroidery or small transfer | 3–4 in wide, 2–3 in tall | Mid-sleeve, outer face |
Full back graphic | DTF / TPU / silicone | 10–12 in | 3–4 in below collar, 1–2 in side margin |
Center chest sponsor block | DTF / vinyl heat press | 8–10 in | 3–3.5 in below collar |
The front-back split isn't a style preference. It's the structure that keeps embroidery's durability and clean hierarchy working with the fabric — not against it. At the same time, heat transfer handles the large back surface that gets seen across the water.
Caps & Neck Gaiters: Process Matching & Recommendations
Two items. Two different answers.Professional OEM services for fishing apparel usually specify decoration methods for each product category.
Caps get embroidery . Gaiters get sublimation . The logic behind each is simple — you just need to know what these items do on the water.
Structured Fishing Caps & Trucker Hats: Embroidery First
A structured fishing cap has pre-shaped panels, a curved crown, and a rigid front face built to hold form. That construction makes embroidery the natural match. The panel doesn't flex the way a tournament shirt back does. Thread sits well on a firm surface. It stays dimensional through repeated washes and holds its edge under UV exposure and salt air.
Heat transfer on a foam-front trucker panel is a mismatch. The press can't conform to the curve, and adhesion fails faster on stiff panel materials. Stick with embroidered logos on caps. Keep them 2–3 inches wide , centered on the front panel, with medium stitch density. That's where the embroidered hat logo works best as a durable, professional fishing brand anchor.
Neck Gaiters: Sublimation, No Exceptions
A neck gaiter isn't worn one way. It's a tube of high-stretch polyester. You pull it up over your face, twist it into a beanie, or wear it as a hood — sometimes all in the same afternoon.
That kind of stretch rules out embroidery. Rigid thread on a face-contact item creates friction and bulk. It also cracks under repeated stretching.
Sublimation is the only serious option here. The ink bonds into polyester fibers rather than sitting on top of them. You get zero surface feel. No peeling. No cracking. No added thickness against your face in 90-degree heat.
The production process is specific: a clamshell heat press , a 10-second pre-press to remove moisture and wrinkles, then a 60-second press at 393°F . This delivers vibrant, opaque color across the full gaiter surface — unlimited colors, no hand feel, no bulk.
For fishing tournament kits or charter guide uniforms, sublimation turns your entire gaiter into a branded canvas. Gradient water patterns, full-wrap fish art, sponsor color systems — all of it prints with detail that no embroidered patch can match.
The Matched Kit Strategy
Item | Method | Reason |
|---|---|---|
Structured cap / trucker hat | Embroidery | Rigid panel holds thread well; no press-adhesion issues |
Neck gaiter (polyester) | Sublimation / heat transfer | Stretch tolerance, zero hand feel, full-surface color |
Run them as a matched kit. The embroidered cap gives you logo authority. The sublimation gaiter gives you comfort and coverage. Your branding stays coordinated. The decoration method stays right for each garment.
Heat Transfer vs Embroidery Durability: Field Test Data
Numbers don't lie. The wash cycle gap between these two methods is significant.
Embroidery holds clean logo integrity past 200 wash cycles . Standard heat transfer starts showing failure between 10 and 50 cycles . Premium DTF and TPU systems — the best heat transfer technology available — top out around 80–100 cycles . That's with strict cold-wash, low-heat-dry care every single time.
For a charter guide running gear through two washes a week? That math matters.Durability testing is equally important for every private label fishing apparel collection.
The Wash Cycle Reality
Here's what controlled testing shows across decoration methods:
Stress Factor | Embroidery | Standard HTV | Premium DTF/TPU |
|---|---|---|---|
Wash cycles before visible wear | 200+ | 10–30 | 30–100 |
Rub resistance (1–5) | 5 | 3 | 3–4 |
UV/sun fade resistance | Excellent | Fair | Fair–Good |
Crack/peel risk | None | Moderate–High | Low–Moderate |
Cold weather brittleness | None | Moderate | Low |
A 50-cycle field test on poly-cotton performance shirts confirms the pattern. Embroidery showed zero degradation at 50 cycles — no cracking, no edge softening, no color shift. DTF transfers stayed stable through about 40 cycles. Minor edge softening showed up after that, but appearance stayed acceptable through cycle 50. Multi-layer vinyl heat transfer started cracking near wash 50. Surface degradation was visible.
Budget HTV doesn't make it to cycle 30. Cheap transfers fail at 10–15 washes.
UV Exposure: Where Heat Transfer Adhesives Break Down
Two hundred hours of direct sun is a slow durability test. Fishing apparel goes through that every season.
Polyester embroidery thread carries an excellent UV resistance rating. No adhesive layer means no peel pathway. Color fade is slow and tied to thread quality — not a structural failure mode.
Heat transfer vinyl is least recommended for high-temperature outdoor use . The adhesive softens under long sun exposure. The adhesive loses integrity. Peeling follows. In dry environments with repeated sun exposure, transfer layers go brittle before they peel. That's worse, because the brittleness speeds up cracking during the flex of casting motions.
Silicone and TPU patches hold up better than standard vinyl under UV. But the durability data still points to 30–50+ wash cycles — not 200-hour sun benchmarks.
Salt and Moisture: Why Adhesive Bonds Fail
Most fishing apparel buyers never hear this part explained.
Embroidery thread penetrates the fiber matrix of your performance fabric. It creates mechanical anchor points. The logo moves with the knit, flexes through casting, and survives deck soaking. No adhesive layer exists to break down under salt exposure.
Heat transfer relies on a thermoplastic adhesive film . Repeated saltwater soaking, combined with deck heat and UV, drives molecular breakdown. Plasticizers leach out. Edges lift. Darker, high-ink-density zones — right where a tournament logo sits — break down fastest under repeated wetting and friction.
TPU and silicone patches are more water-resistant than standard vinyl. Fishing Apparel Suppliers market them for sports kits and tactical outdoor gear, and that's accurate. But their wash durability ceiling of 30–50+ cycles is still less than a quarter of what embroidery delivers.
What This Means for Charter and Tournament Operations
The practical split breaks down like this:
Year-round guides, fleet uniforms, tournament crews running 100+ washes per year:
- Front chest and shoulder logos → embroidery
- Why: 100–200+ wash durability, strong UV resistance, zero peel risk, no special care routine needed
Seasonal sponsor shirts, complex back graphics, limited-run tournament kits:
- Back graphics and full-color art → premium DTF or TPU/silicone heat transfer
- Why: photorealistic color that embroidery thread can't match — tag these garments for cold wash / low-heat dry and plan for a 30–50+ wash lifespan
Fishing apparel manufacturer describe embroidery on daily-use uniforms as outlasting the garment itself . For fishing apparel that faces salt, sun, and a commercial laundry schedule, that's not a sales pitch — it's the durability profile you're buying into.
Order Volume & Cost Comparison Matrix
Budget is where most fishing apparel decisions get made.
Not on durability charts. Not on fabric compatibility. On the number staring back at you from a quote sheet — and whether it makes sense for 12 tournament jerseys or 300 charter uniforms.
Here's the truth about embroidery vs heat transfer costs: they don't compete at every order size . Each method has a zone where it wins on economics. Know those zones. That's what stops you from overpaying on small runs or losing money at scale.
The Setup Cost Problem (Under 10 Pieces)
Embroidery carries a one-time digitizing fee of $25–$40 per logo at US shops. That fee doesn't change whether you're ordering 3 shirts or 300.
Spread $35 in digitizing across 8 sample jerseys. You've already added $4+ per shirt before a single stitch runs. The per-piece embroidery cost runs $6–$15 for small logos at micro quantities . So your total cost per logo lands between $10 and $18+ on a sub-10-piece run.
Heat transfer has no meaningful setup cost at this tier. DTF is the most cost-effective option under 30 pieces for full-color or complex artwork. Per-garment add-on: $1.50–$4.00 . For crew trials, pre-tournament samples, or testing a new charter brand look, heat transfer is the clear call.
The Crossover Zone (10–100 Pieces)
This is where the comparison gets closer — and where your design type breaks the tie.
Order Size | Heat Transfer (per logo) | Embroidery (per logo) |
|---|---|---|
10–47 pcs | ≈ $2–$3 | ≈ $5–$6 |
48–100 pcs | ≈ $2–$3 | ≈ $3.50–$5 |
At a 48-piece tournament order with a 6,000-stitch logo, embroidery drops to $3.50/item . Heat transfer stays in the $2–$3 range . The gap narrows, but it doesn't close.
The tiebreaker is your design:
Multi-color sponsor art, gradient fish graphics, photographic back panels → heat transfer wins on both cost and capability
Simple fleet marks, one or two-color chest logos, standardized team identity → embroidery earns its premium with durability that justifies the gap
One note on digitizing's long-term value: that $25–$40 setup fee is a one-time charge . Your stitch file stays on file. Every future reorder at this size runs at pure variable cost — no repeated setup fees. For a fishing club that orders every year, the math gets better with each reorder cycle.
Scale Economics (100+ Pieces)
Past 100 pieces, embroidery's per-unit cost stabilizes. Its value shifts from "just a logo" to a long-term branding asset.
Order Size | Heat Transfer (raw cost) | Embroidery (apparel benchmark) |
|---|---|---|
100 pcs | $0.50–$1.20/logo | $3.50–$5.00/item |
300+ pcs | $0.40–$1.00/logo | $3.50–$4.50/item |
500–1,000 pcs | $0.35–$0.90/logo | $1.50–$3.00/unit (accessories/uniforms) |
Heat transfer costs stay flat across volume tiers — you get minimal savings at scale. Embroidery's digitizing cost per unit at 100+ pieces becomes negligible. It's no longer a real factor. What you're comparing is a decoration method that costs more per shirt but returns 200+ wash cycles — against heat transfer that runs cheaper upfront but fades out at 30–100 washes under fishing conditions.
Charter guide fleets and tournament organizations run gear through commercial laundry schedules. For those operations, embroidery's lifespan-adjusted cost makes real financial sense. A shirt that lasts 200 washes at $4.50/logo beats a shirt needing replacement after 50 washes at $1.00/logo — every time.
One hidden cost worth flagging on heat transfer at volume: every design revision means new film or vector prep costs. Embroidery's stitch file handles reorders with no changes needed. Sponsor rosters change. Boat names change. Each time that happens on the heat transfer side, the artwork update costs stack up fast.
The 30-Second Cost Decision Table
Your Situation | Best Method | Why |
|---|---|---|
Under 10 pcs / sampling | Heat Transfer (DTF) | No setup fees; $1.50–$4/logo |
10–47 pcs, complex art | Heat Transfer | Lower unit cost, better color capability |
10–47 pcs, simple logo | Embroidery | Premium durability justifies modest cost gap |
48–100 pcs, any design | Embroidery or DTF | Near-cost-parity; let design type decide |
100+ pcs, fleet/uniform | Embroidery | Digitizing negligible; lifespan ROI wins |
100+ pcs, seasonal/event | Premium DTF/TPU | Lower raw cost; acceptable for short-lifespan use |
Functional Fabric Compatibility & Warning Checklist
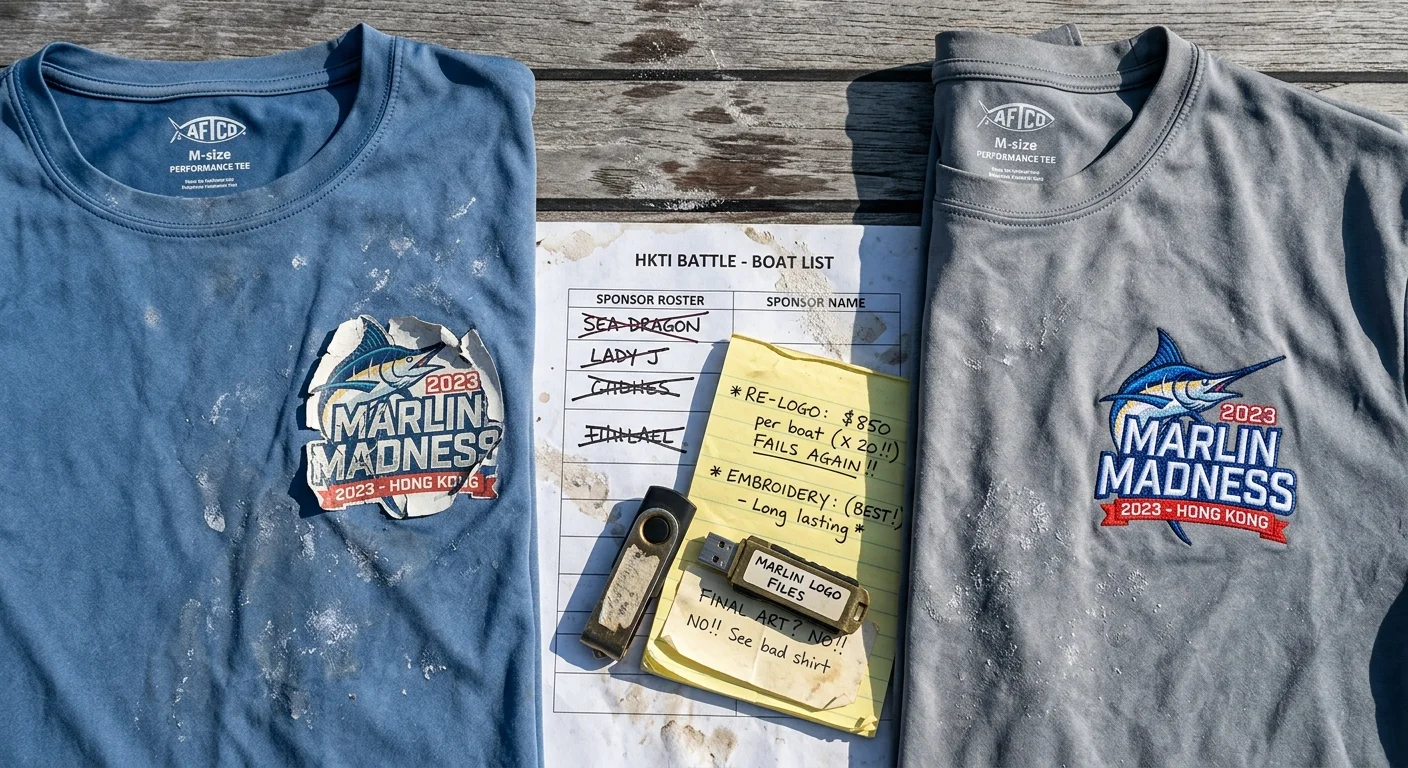
Most logo failures on fishing apparel aren't decoration failures. They're fabric compatibility failures — caught too late, after the order ships.
Performance fishing fabrics are engineered systems. Lightweight polyester UPF knits. DWR-coated softshells. 4-way stretch sun hoodies. Each one has a specific structure. Your decoration method either works with that structure — or it destroys it.
Here's what to verify before you lock a method.
Confirm These Four Fabric Variables First
Before you touch a quote sheet, know your fabric's:
Fiber content (polyester, nylon, poly-spandex blend)
Construction (knit vs. woven, GSM, whether it has engineered capillary channels)
Coating or membrane (DWR finish, PU/PVC coating, microporous laminate)
Stretch percentage (critical for embroidery backing decisions and transfer flex compatibility)
These aren't just spec sheet details. They're the decision variables that determine whether your logo still looks clean at wash 50 — or starts peeling at wash 8.
Embroidery on Lightweight Polyester Fishing Knits: The Density Problem
Fishing performance shirts run 120–170 g/m² . The fabric is thin. It wicks because it has engineered microfiber pathways and capillary grooves built into the knit structure.
Dense embroidery fills block those pathways. This is a physical problem. A high-stitch satin fill on a thin polyester knit creates a rigid plaque. It stiffens the panel, cuts airflow, and stops wicking right under the logo.
The checklist for safe embroidery on fishing knits:
Max stitch density: ~0.40 mm between rows for satin areas — no tighter
Fill type: Use tatami or open-mesh step fills instead of ultra-dense satin columns
Stitch length: Increase to 3.0–3.5 mm on satin sections to reduce surface coverage
Underlay: Edge run only — cut heavy zigzag underlay on lightweight panels
Needle: Ballpoint 70/10 or 75/11 to push yarns aside rather than cut filaments
Hooping tension: Just enough to keep fabric flat — over-hooping causes permanent puckering on light knits after release
Backing: Cutaway performance backing, not stiff tear-away, to preserve stretch without distortion
The logo size limits from earlier in this guide (3–4 inches on front chest) connect directly to this. Keeping embroidery under 20–40 cm² on the primary chest panel isn't just an aesthetic call. Above that threshold, wicking performance drops. Push solid embroidery fill past 80 cm² on the front torso , and you're in high-risk territory — expect local heat buildup and moisture trapped under the logo.
Practical rule: keep total front torso embroidery under 10% of the panel surface.
Heat Transfer on Coated & Waterproof Fishing Gear: The Temperature Warning
DWR-finished fishing jackets and coated softshells have a hard limit. Most decorators don't spell it out upfront.
PU and PVC coatings — along with most DWR systems — start to soften and break down at 140–160°C under direct press contact . Standard vinyl heat press runs well above that. The damage isn't just cosmetic. Delamination, gloss change, and permanent coating breakdown can wipe out waterproof performance completely.
Critical warnings for heat transfer on coated fishing apparel:
Maximum safe press temp on coated/membrane fabrics: 130–140°C — no higher without a silicone buffer sheet
Dwell time: 8–12 seconds maximum with low-to-medium pressure
Post-press checks: Check for gloss change, stickiness, or visible delamination on the fabric's back face right after pressing
For waterproof-rated gear: Run a spray or hydrostatic test after decoration if the spec carries a specific waterproof rating
Embroidery on waterproof shell fabrics carries its own risk. Every needle pass punches through the waterproof barrier. If you can't avoid embroidery on a shell, seam-tape the embroidered zone on the inside using tape that's compatible with your coating. Then run a spray test before the order leaves.
High-Stretch Zones: Where Standard Transfers Fail
Shoulder panels, underarm gussets, side stretch panels — these are the flex zones on performance fishing shirts. Standard HTV and rigid heat transfer films don't belong here.
For any zone with 4-way stretch or >30% elongation , use:
TPU or silicone transfers rated to stretch ≥ the fabric's actual elongation (often 150–200% for performance knits)
Validate with a 180° peel test after 24-hour cure and 50–100 cyclic stretch cycles to 50% extension on the actual production fabric — not a generic swatch
A transfer can pass the adhesion test on a firm panel and still fail after three months of casting motion. That happens when the transfer wasn't stretch-tested on the right fabric.
Pre-Production Testing: The Required Minimum
Run these three tests on every new fabric lot — before the full run starts:
Test | What to Check |
|---|---|
Wash test (5+ cycles at care temp) | No cracking, edge lift, or color shift |
Stretch/recovery test (knits) | Logo holds without cracking through full range of motion |
180° peel test after 24h cure | Cohesive failure in logo film before adhesive releases = strong bond |
For wicking shirts, compare drying rate or wicking strip behavior between a decorated panel and a blank control. A logo that slows drying is a sign your coverage or density is too high.
For waterproof gear, run a shower test on the decorated panel . That's the only way to confirm your decoration method hasn't created new leak points.
These tests aren't quality control overhead. They're the difference between a logo that holds up across a full charter season — and a return claim you can't defend.
Scenario-Process Match Quick Reference Table
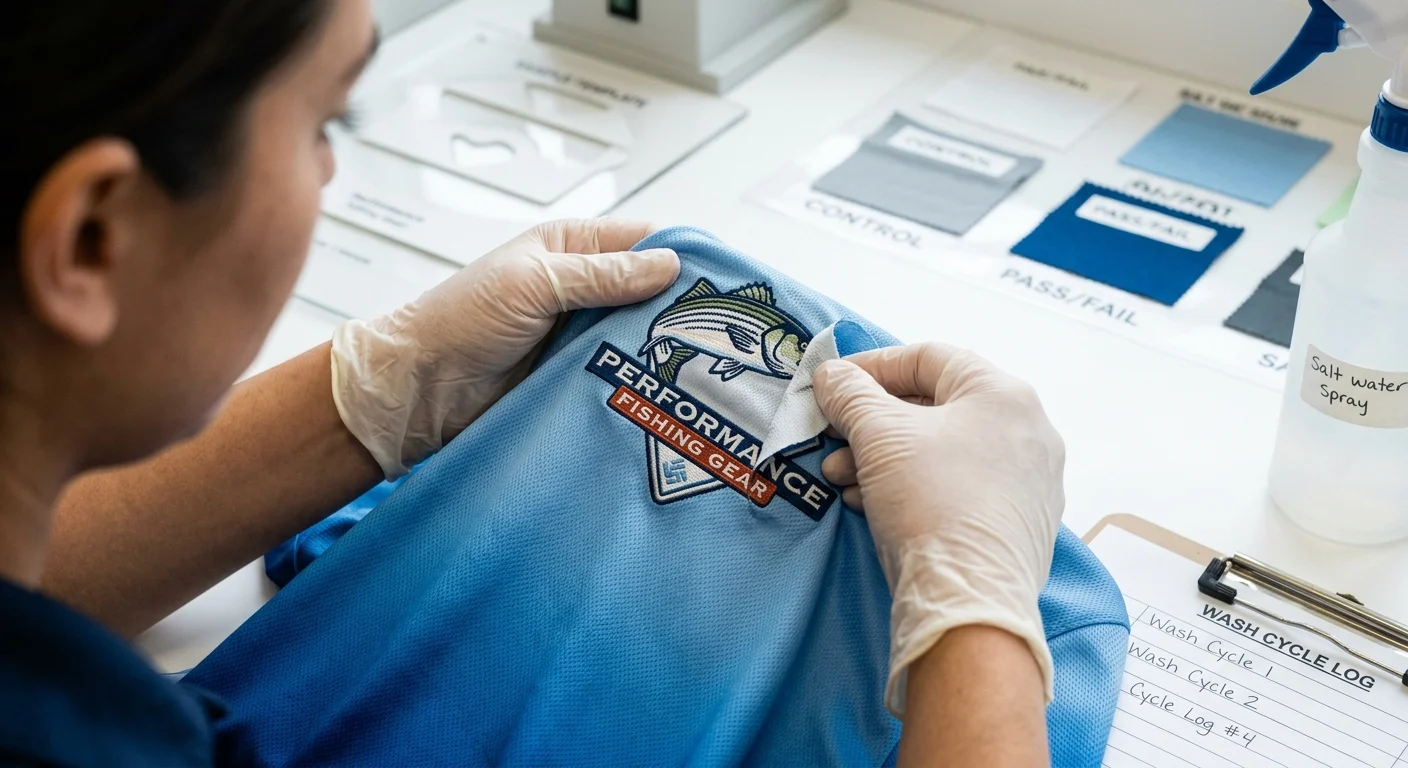
Every decision in this guide comes down to one question: what is this garment doing on the water?
Use this table to match your situation to the right process in under 30 seconds.
Garment / Scenario | Core Demand | Best Process | Why It Works |
|---|---|---|---|
Tournament Performance Shirts | 50–75+ wash cycles, UV color hold, team hierarchy marks | Polyester-safe embroidery (colorfast poly thread, 75–85 gsm backing) | Thread locks into the knit — no film to peel off under sweat and stretch |
Charter Fleet Sun Hoodies | Full-color back art, breathability, low MOQ + frequent art changes | DTF or stretch HTV (sub-100 micron film, low-temp press) | Reproduces photo-quality gradients; near-zero bulk keeps the fabric soft and breathable |
Structured Fishing Caps | Front branding, salt/sun/sweat exposure, foam or buckram panels | 3D puff embroidery (front mark) + flat embroidery (text) | No press heat to crush the crown; UV-resistant poly thread outlasts pigment film in salt environments |
Mixed Kit (Front + Back) | Budget control, premium front crest, bold back graphic | Embroidery on chest/shoulder + DTF/HTV on back | Front stitch = long-term durability; back transfer = lower stitch count, faster production, easier per-player updates |
Neck Gaiters / Buffs | High stretch, skin contact comfort, repeated wash-and-stretch cycles | Silicone or TPU heat press transfer (low-temp, multi-directional stretch rated) | No needle damage to ultra-stretch knit; the flexible polymer layer moves with the fabric and won't crack |
UPF Softshell / Rain Jackets | Preserve waterproof membrane, brand visibility on technical shell | Low-temp silicone transfer — or embroidery + interior seam-seal tape | High press temps melt PU coatings; each embroidery needle hole becomes a leak path without post-stitch tape |
Heavy-Abuse Saltwater Uniforms | Maximum longevity in salt, sun, deck friction, chemical washdowns | Solution-dyed polyester embroidery (tight, low-snag fill patterns, reinforced backing) | One textile system — nothing to peel, blister, or lift under repeated saltwater soak and hot-deck drying |
Implementation Specs Worth Bookmarking
Embroidery on performance fabrics:
- Thread: 60–75 denier polyester, lightweight cut-away backing
- Minimum letter height: 3–5 mm for tournament readability
- Stitch density: open-mesh or tatami fills — skip ultra-dense satin columns on thin knits
DTF/HTV on sun hoodies and back panels:
- Film spec: ≥50 washes at 40°C, ≥100% elongation rating
- Press setting: reduced dwell time, moderate pressure — that's it
Silicone/TPU on gaiters and shells:
- Thickness: under 0.3 mm — go thicker and you get stiff panels on curved neck zones
- Adhesive match: confirm the glue chemistry for your base fabric — polyester and nylon react in different ways
Saltwater uniform embroidery:
- Thread spec: solution-dyed polyester, ISO 105-B02 lightfastness Grade 7–8 minimum
- Stitch programming: compact fill, locked perimeter stitches, minimal loose loops — loose loops catch on cleats and rail hardware fast
Conclusion
Your fishing apparel isn't just merchandise — it's working gear. It clocks 200+ hours under brutal UV, gets dunked in saltwater, and goes through the wash after every tournament. The logo on that gear has to survive the same beating.
Here's what this guide keeps coming back to: there's no universal winner . Embroidery is the right call for structured hats and hoodie chest placements. DTF transfer and sublimation printing are the better fit for performance fishing shirts and neck gaiters. Those fabrics need to wick moisture and stay flexible — stiff logos don't cut it there. Also, don't overlook your order volume. That one factor alone can flip the cost math on its head.Many buyers reduce long-term costs by sourcing wholesale fishing apparel with the right decoration process from the start.
Stop guessing. Pull up the Quick Reference Table. Match your garment type to your scenario. You'll have your answer in 30 seconds.
The fishing brands that look most legit on the water didn't get there by accident. They made a clear, deliberate choice — and stuck with it.
Now it's your turn. Lock in the right process, place your order, and get on the water looking like you mean it.