You already know how to read the water. You know which lures work at tide shifts, which guides are putting clients on redfish before sunrise, and why serious anglers pay $65 for a shirt that performs when a $15 option sits right there.
That knowledge — that insider credibility — is the single most valuable asset for launching a private label fishing apparel line. Most people who have it never act on it.
This guide changes that.
What follows is a numbers-backed blueprint for building your own custom performance fishing shirts brand. It covers:
Locking in a profitable niche
Pricing your first SKUs
Getting them in front of buyers who are ready to spend
No fluff. No theory. Just the exact steps — with real cost figures and supplier names — that turn your fishing-circle influence into a margin-positive brand.
Step 1: Lock In a High-Margin Fishing Niche Before You Touch a Single SKU
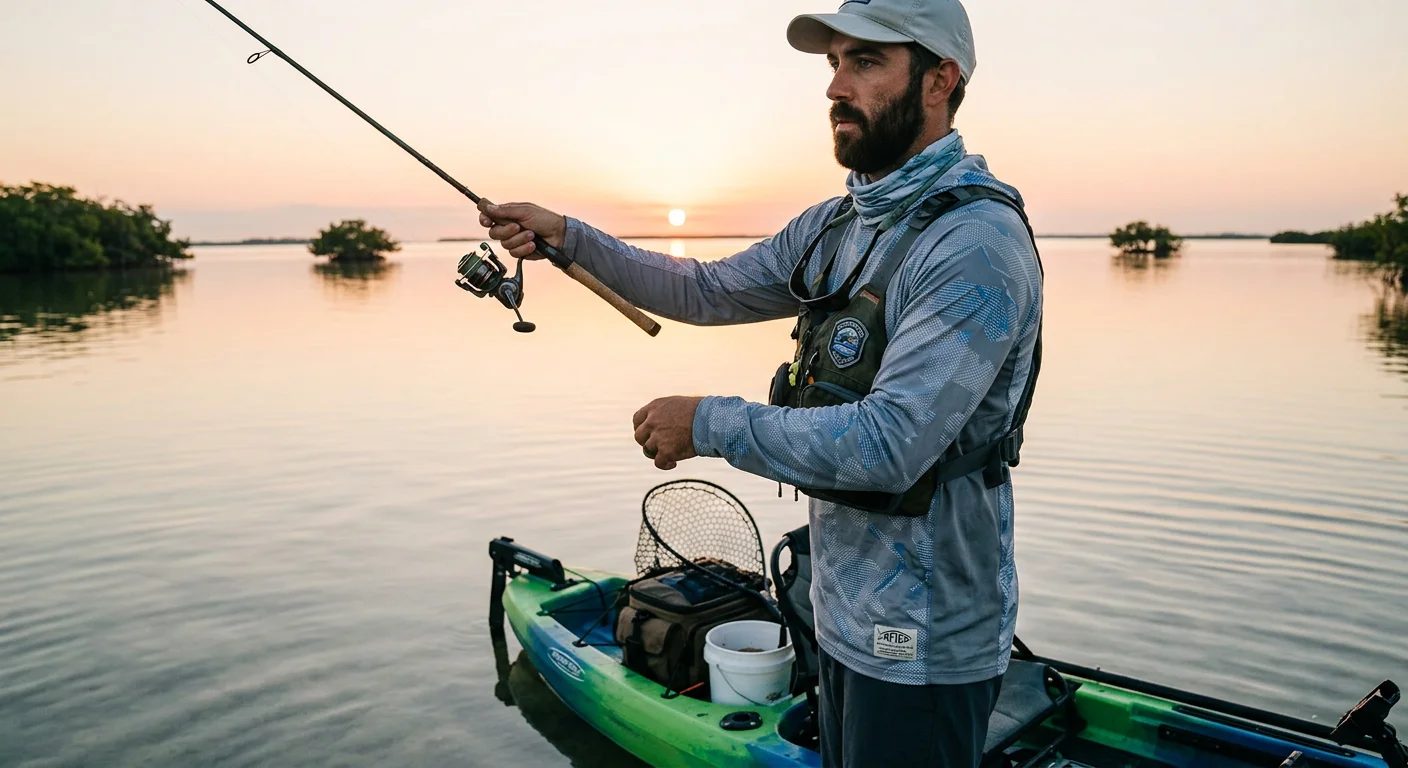
The biggest mistake new fishing apparel brands make isn't poor design or bad suppliers. It's trying to sell to everyone who fishes .
"Performance fishing shirts for all anglers" is not a brand. It's a commodity. Commodity brands compete on price — a race you'll lose against established players with six-figure ad budgets.
Here's what works: own one specific scene so well that people in that community see your brand and think "that's for me." That's the goal. Pick a scene. Own it.
The 5 Niches With Proven Margin Potential
Cross-referencing Amazon Best Seller data, Reddit r/fishing threads, and keyword search volumes reveals five segments with strong purchase intent and willingness to pay a premium:
Niche | Why It Pays | Key Product Hook |
|---|---|---|
Saltwater / Offshore | High AOV, repeat buyers, functional spend is normal | Salt-resistant fabric, high-visibility safety colors, UPF 50+ |
Kayak Fishing | Loyal community, very specific pain points | Extended back hem (stops splash-soak), waterproof phone pocket |
Tournament Team Jerseys | B2B bulk orders, low customer acquisition cost | Custom logos, team colorways, numbering |
Women Anglers | Massive sizing gap in current market, aesthetic premium | Fitted cut, UPF 50+, design-forward prints |
Youth / Family | Weekend family spend drives bundled purchases | Lightweight, quick-dry, tear-resistant |
Recommended starting point : Kayak fishing or saltwater. Both have dense keyword clusters — think moisture wicking fishing apparel , UPF fishing clothing supplier , sublimation fishing jerseys . Plus, these communities are vocal about gear frustrations online. That's a goldmine for product positioning.
Your First Launch: The 3+1 SKU Framework
Don't launch 10 products. Launch 4. Keep it focused.
SKU | Role | Price Point |
|---|---|---|
UPF Long-Sleeve Fishing Shirt | Core profit driver | $49–$59 |
Quick-Dry Fishing Cap | Low-barrier entry / upsell | $18–$24 |
Multifunctional Buff/Face Mask | High-reorder accessory | $14–$18 |
Full-Sublimation Jersey | B2B tournament test | Custom quote |
This structure does three things at once. It anchors your brand on custom performance fishing shirts . It pulls in first-time buyers through affordable accessories. And it opens a B2B channel via fishing tournament shirts custom — no separate catalog needed.
⚠ Common trap : Launching with heavy camo or complex graphic prints before doing a small-batch washability test. Salt water + repeated washing = color bleed complaints. Those complaints tank your reviews fast, especially in the early days.
Validate before you invest. Run your niche through Google Trends. Scan Amazon's top 50 fishing apparel listings and look for recurring complaints in 2-3 star reviews. Spend 30 minutes in Reddit r/fishing searching your target scene. Find people describing a frustration your product solves — that's your launch brief.
Step 2: Break Down Your Startup Budget and Per-Unit Profit Model
Here's a number most fishing apparel beginners never calculate before their first order: the real landed cost per shirt. Not the EXW factory quote. The actual cost after fabric, stitching, sublimation print, woven label, hang tag, poly bag, international freight, and payment processing fees all add up. Get this number wrong and a "60% margin" business starts losing cash without you noticing.
So let's fix that with three launch tiers — each one matched to a different risk level and budget.
The 3-Tier Budget Framework
Tier 1 — $500: Validate With Print-on-Demand (Zero Inventory)
This is your proof-of-concept stage. The goal isn't profit — it's data.
Cost Item | Estimated Range |
|---|---|
Logo + 2–3 design files (Fiverr) | $100–$150 |
Sample orders (3–5 shirts via Printful/Printify) | $75–$175 |
Product photography | $100–$150 |
Meta/TikTok test ads | $100–$200 |
For moisture wicking fishing apparel on POD, fulfillment costs run $18–$27 per shirt. Price it at $35–$45 and you net $8–$12 gross per unit. That's about 25–35% margin before platform fees.
That margin looks thin. It's supposed to. You're not here to get rich yet.
You're here to answer real questions:
- Which colorways convert?
- Will your target angler pay $39–$49?
- What does your customer acquisition cost look like in practice?
Tier 2 — $2,000: First Private Label Run (50 pcs/colorway)
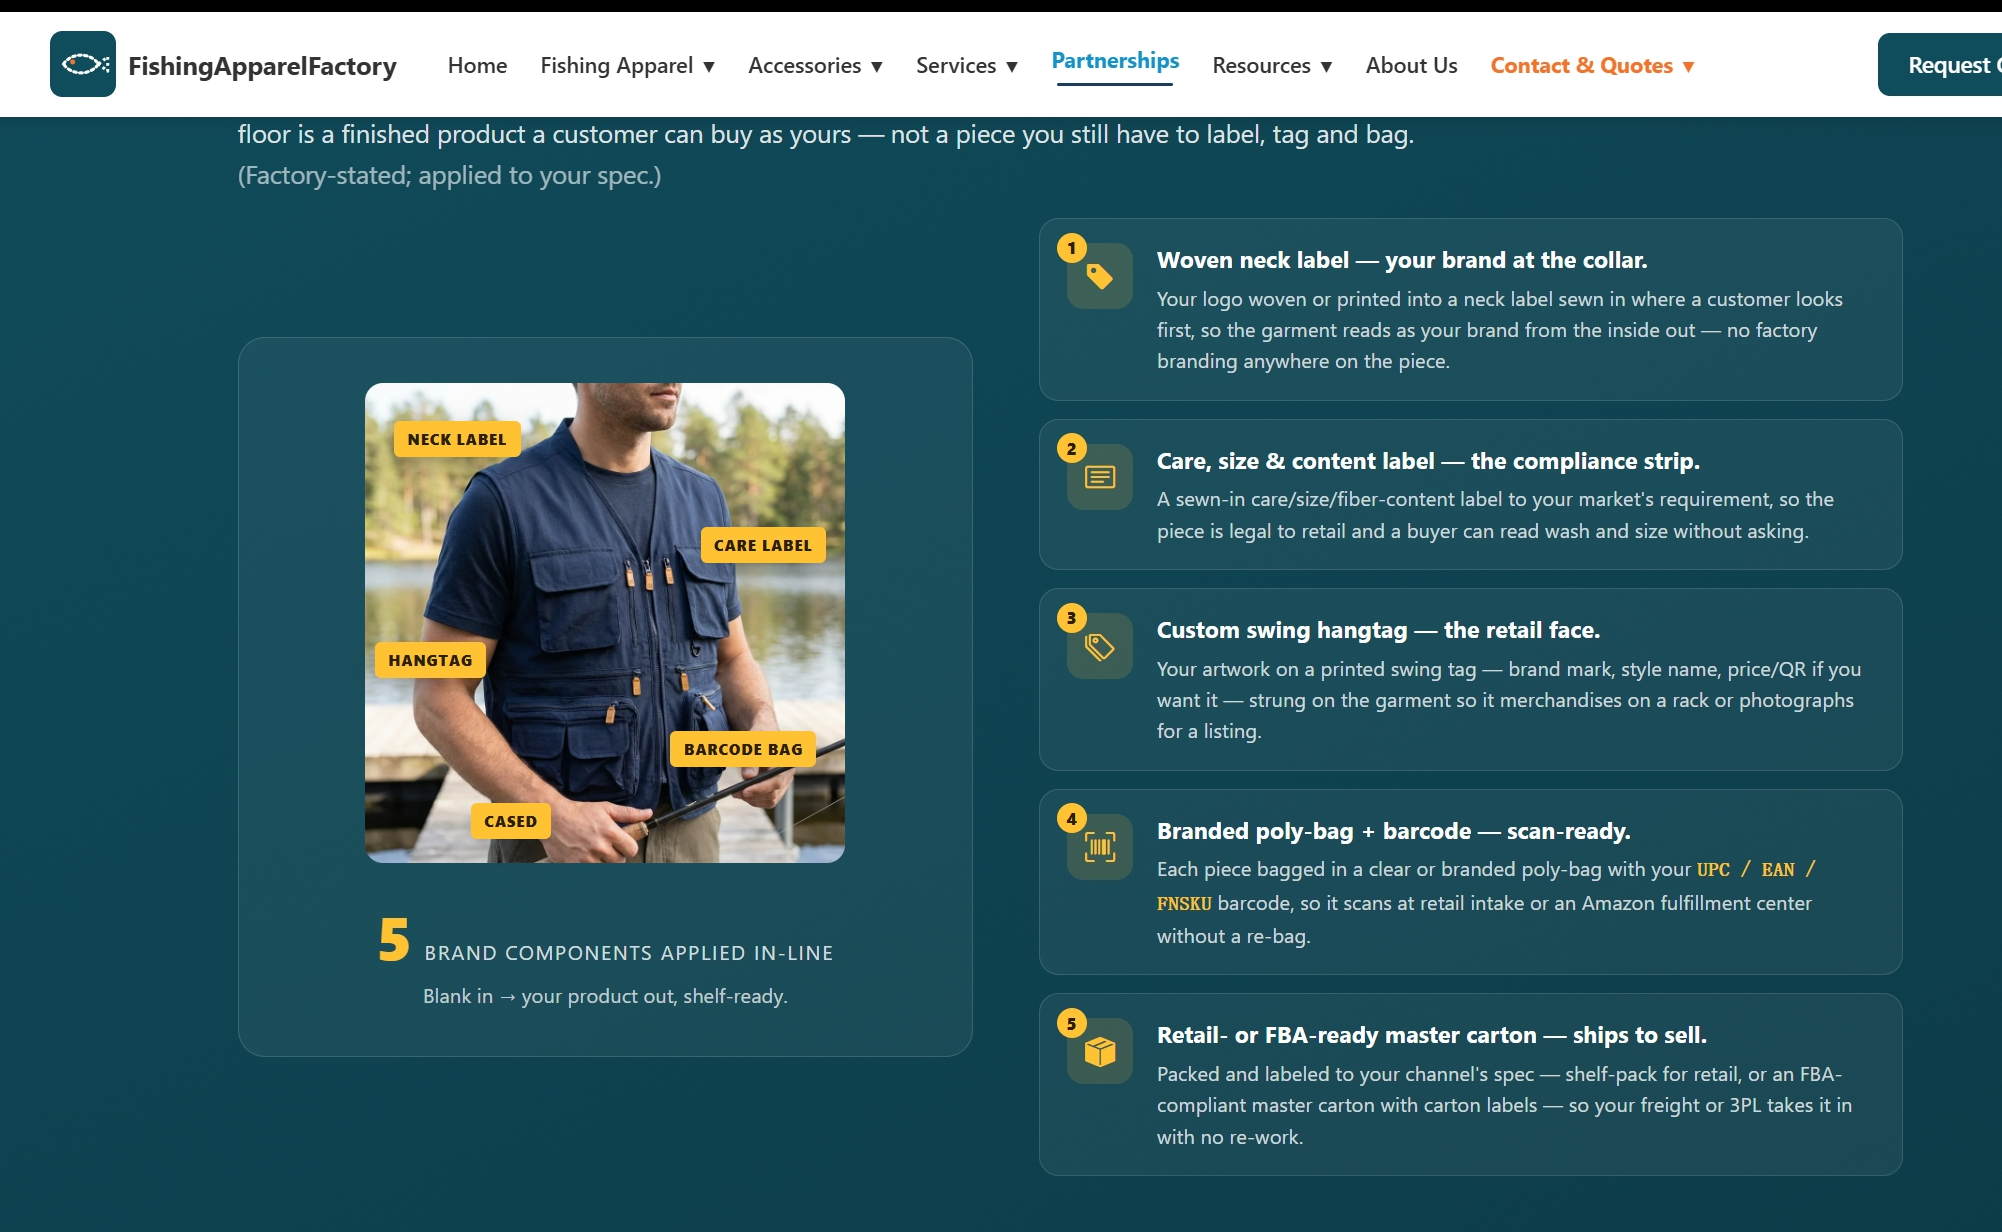
This is where white label fishing gear gets real. You get your own woven label, hang tag, and wash care instructions sewn in.
A solid starting structure: 2 styles × 1 color × 50 units = 100 pieces.
Cost Category | Range |
|---|---|
Sampling + pattern development | $300–$600 |
Production (EXW ~$9/pc × 100) | ~$900 |
Private labeling (labels, tags, bags) | $150–$250 |
International air freight | $200–$400 |
Ad testing (2–3 weeks) | $300–$500 |
At a $35 retail price with $11 all-in landed cost, your gross margin sits near 60% . Sell all 100 units. That's ~$2,400 gross margin. Keep ad spend under $800 and you finish net positive on your first batch — a milestone most apparel startups never reach.
Tier 3 — $5,000–$7,000: Full Private Label Fishing Apparel Launch
Now you're building a real brand. Three styles, two colors, 100 units each — 600 pieces total .
At this volume, your EXW cost drops to $7–$9/shirt for standard UPF fishing clothing in 120–180 gsm polyester-spandex. Here's the full unit cost breakdown:
Cost Component | Per-Unit Range |
|---|---|
Performance fabric (UPF 50+) | $1.50–$3.00 |
Cut & sew (basic; add $2 for thumb holes/zippers) | $2.00–$5.00 |
Sublimation or screen print | $1.00–$3.00 |
Packaging + labels | $0.20–$0.60 |
QC + factory overhead | $0.30–$1.00 |
EXW Total | $5.00–$12.50 |
Retail at $49. Land cost at $13. That's 73% gross margin at the shelf — before channel fees eat into it.
The Pricing Formula You Need
Most guides say "aim for 50% margin." For custom performance fishing apparel sold DTC, that's not enough information. It leaves out too much.
Use this instead:
Retail Price = EXW Cost ÷ (1 − Target Gross Margin)
With a $9 EXW cost and a 60% gross margin target: $9 ÷ 0.4 = $22.50 floor .
That sounds workable. But add freight (10–20%), payment processing (3–5%), and ad spend (10–25%), and your net margin shrinks fast. Price below $45–$49 minimum and you're left with very little.
The healthy net margin range for outdoor clothing private label brands running DTC: 15–25%. Drop below 15% and one slow month wipes your working capital.
⚠ Common trap : You quote your margin using EXW cost alone. Then Shopify fees, return shipping, and Meta ad CPMs cut a "65% margin product" down to 9% net. Map the full cost stack before you lock in your retail price.
Step 3: How To Vet Fishing Apparel Suppliers (And Avoid the Ones That'll Burn You)
Finding a supplier is easy. Finding one that won't swap your approved fabric sample for cheaper material on the production run — that's the hard part.
Three distinct fishing apparel supplier types exist. Each one fits a different stage of your business. Pick the wrong type at the wrong stage, and you'll either burn cash on inventory you can't move, or lose serious margin. Know which one you need before contacting any factory.
The 3 Supplier Models: A Direct Comparison
Supplier Type | Best For | MOQ | Sample Lead Time | Key Risk |
|---|---|---|---|---|
OEM/ODM Private Label Factory | Established brand, repeat reorders | 50–300 pcs/color | 7–15 days | Fabric substitution on bulk runs |
Blank Apparel + Decorator (e.g., S&S Activewear, A4 Sportswear) | Tournament teams, guide outfitters, fast turnarounds | 10–50 pcs | 3–5 days | Limited fabric performance specs |
Print-on-Demand (e.g., Printful, CustomCat) | Design validation, zero-inventory testing | 1 pc | 2–4 days | Thin margins, limited UPF fabric options |
Start with POD if you're in the $500 validation tier from Step 2. Once you've confirmed which colorways convert, move to a blank-plus-decorator model for your first fishing tournament shirts custom run. Save full OEM for Tier 3 — that's when you're placing 200+ pieces per color and need woven labels, custom hang tags, and real UPF fishing clothing performance specs sewn in.
Build Your RFQ Package Before You Send a Single Message
Most first-time buyers contact factories with nothing more than a vague description and a logo PNG. Factories push those inquiries to the bottom of the pile. Prepared buyers get responses first.
Put this together before reaching out to any fishing shirt manufacturer :
Target customer profile — "saltwater kayak anglers, mixed gender, sizes S–2XL, approx. 30% female"
SKU list with specs — fabric weight (target 160–180 GSM), composition (100% polyester preferred for moisture wicking fishing apparel ), UPF rating requirement (UPF 50+), colorways per style
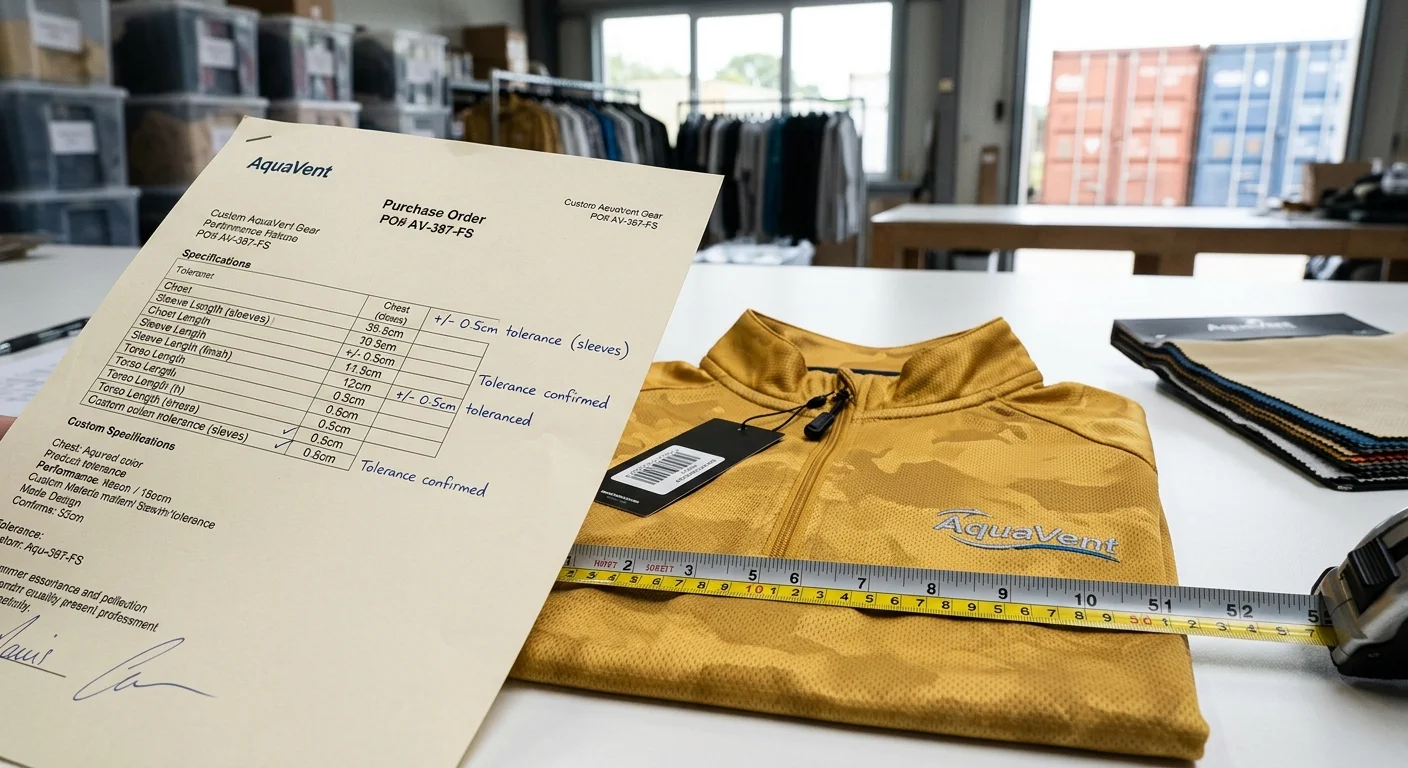
Technical measurements — chest, body length, shoulder width, sleeve length by size, with ±1.5cm tolerance written in
Logo files — AI/EPS vector format only, with Pantone color codes specified
Order quantities — total units broken down by color (e.g., 600 total: 200 per color)
Timeline — sampling expected in 7–10 days, bulk production in 45–60 days
This one document puts you ahead of 80% of inquirers. Factories that get a complete RFQ treat you as a serious buyer.
The Negotiation Numbers That Count
Comparing quotes from outdoor clothing private label factories? These are the specific terms worth pushing on:
MOQ pricing tiers — ask for a full breakdown:
- 50–99 pcs/color: higher unit price
- 100–199 pcs/color: mid-tier price
- 200+ pcs/color: target price
Sampling fees : Expect $30–$100 per style . Push for a written clause that credits sampling costs against your first bulk order above a minimum quantity. Get that in writing.
Payment structure : Standard is 30% T/T deposit, 70% before shipment. On your first order, this is non-negotiable. On your second, you have leverage.
Defect rate clause : Write in a maximum acceptable defect rate of ≤2% . Anything above that triggers either free replacement units or a deduction at 1–1.2× the ex-factory unit cost. Name a third-party inspection report (SGS or QIMA) as the binding evidence — not the factory's own QC report.
4 Supplier Red Flags That Kill Brands Slowly
These aren't big, dramatic failures. They're slow leaks that eat your reviews and your reorder rate.
① Fabric bait-and-switch. Your sample arrives in 170 GSM performance polyester. Your bulk order ships in 130 GSM basic interlock. Lock the fabric batch number onto the approved sample card. Require that same batch spec in your purchase order — no exceptions.
② The middleman factory. They show you a polished showroom on video call. Production runs at an uncertified subcontractor facility. Check ImportYeti or Panjiva to verify the supplier's real export history before signing anything. Search by company name and cross-reference their HS code export volume.
③ No IP protection clause. Your sublimation fishing jerseys design gets tweaked and shows up on another buyer's store within 60 days. Your contract must include: ownership declaration for all patterns and artwork, a ban on selling near-identical products to third parties, and a named arbitration jurisdiction.
④ Rosy sampling, chaotic bulk production. Factories sometimes put their best operators on sample runs. Full production then goes to junior workers with loose QC oversight. Require a mid-production inspection — either through a third party like QIMA or Bureau Veritas, or negotiate access for a random in-line audit.
Verified Platforms for Finding Your First Supplier
Alibaba Trade Assurance verified factories — filter for "fishing apparel," require Gold Supplier status with 3+ years and a verified factory audit report
Global Sources — stronger for technical sportswear; export documentation is more reliable than general Alibaba listings
S&S Activewear / A4 Sportswear — U.S.-based blank white label fishing gear with domestic shipping; great for your first tournament jersey test run before committing to overseas production
ImportYeti — free tool; paste any brand name and see which factories produce for them and at what volume
⚠ Common trap : Choosing a supplier based on sample quality alone, without checking bulk production capacity. Ask for a factory capacity certificate. Or ask straight out: "What is your output for this style per week?" No clear answer in units per week — that's a red flag.
Step 4: Define Your Fabric Specs and Garment Technical Parameters
Here's what most fishing apparel startups find out too late: a great-looking sample means nothing if the factory can't reproduce it at scale.
The fix is a Tech Pack — a precise, quantified document that locks down every material decision before production starts. Without it, factories fill in the blanks themselves. Your approved 170 GSM performance fabric turns into 130 GSM basic interlock by unit 200. That's the risk.
Fabric Composition and Weight (BOM Spec)
Your Bill of Materials needs these exact parameters written in — no room for interpretation:
Recommended compositions for custom performance fishing shirts:
- 100% high-tenacity polyester — maximum lightweight breathability and UPF performance
- 92% polyester / 8% spandex — 4-way stretch for casting movement; ideal for kayak fishing styles
GSM targets by application:
Use Case | Target GSM | Why |
|---|---|---|
Tropical/summer fishing shirt | 130 gsm | Lightweight, maximum airflow |
All-round UPF fishing clothing | 140–160 gsm | Balances sun protection and durability |
Tournament jerseys | 120–140 gsm | Sublimation color vibrancy |
Write it as: "GSM: 140 ±5 — No substitution below 135 gsm." That one clause stops the most common cost-cutting move factories use on bulk runs.
UPF and Performance Testing Standards
Talking to a moisture wicking fishing apparel or UPF fishing clothing supplier? These test specs belong in your Quality Requirements page. They are non-negotiable:
UPF 50+ target — blocks ≥98% UVB; test per ASTM D6544 + AATCC 183
Must maintain UPF ≥50 after 5 home wash cycles
Color fastness to washing: ≥ Grade 4 (AATCC 61)
Abrasion resistance: ≥ 20,000 Martindale cycles at shoulder and elbow zones
For moisture wicking performance, state it clearly: wickability per AATCC 195 — absorption spread time ≤2 seconds, diffusion height ≥8 cm over 30 minutes. Quick-dry target: moisture content below 10% within 30 minutes. Also add an anti-microbial finish (silver-ion treatment) with bacterial reduction ≥99% per ASTM E2149.
⚠ Common trap : Factories sometimes apply silicone softener to improve hand feel. That treatment kills wicking performance. Add this line to your Tech Pack: "No silicone softener that reduces wicking performance." One missing note wipes out the core function your buyer paid for.
Fishing-Specific Pattern Engineering
Standard shirt POM tables don't cover what serious anglers need. Add these fishing-specific measurements to yours:
Back hem drop : rear hem 3–5 cm longer than front hem — note it as "for casting posture coverage"
Underarm gusset : triangular insert 10–14 cm length, 6–8 cm at widest — critical for overhead casting range of motion
Cuff opening : 0.5–1.0 cm narrower than standard leisure shirts to stop sleeve slippage during retrieves
All POM dimensions carry ±0.5–1.0 cm tolerance. Write the shrinkage requirement as its own line: <3% warp and weft after washing (ISO 6330). Also require a pre/post measurement comparison sheet before bulk approval.
Functional Detail Specifications
Three structural details separate a real fishing shirt from a rebranded athletic tee:
Side zip pocket — opening 16–18 cm, depth 20–22 cm (fits a phone plus a small lure box); #3 nylon invisible zipper; interior lining in 70–100 gsm micro-mesh
Rod holder loop (left chest) — loop width 1.0–1.5 cm, length 4–5 cm; Velcro closure; bartack both ends at SPI 10–12
Back yoke mesh vent — warp-knit mesh, 80–120 gsm, 1–2 mm aperture, covering 70–90% of shoulder width; opening faces downward to block rain ingress; UPF 20–30 minimum on the mesh panel itself
Write the stitch type into your Construction Notes. Use lockstitch on main seams, overlock plus topstitch on side seams, and flatlock at all mesh-to-shell joins. Flatlock removes friction points where panels meet.
Color Specification and the Lab Dip Requirement
Lock every colorway using Pantone or Coloro codes — never describe colors in words. Two proven palettes for fishing apparel:
Low-visibility freshwater : Pantone 371 C (forest green) + 448 C (earth brown) + 7545 C (slate blue)
High-visibility offshore : Pantone 804 C (neon orange) + 803 C (neon yellow)
Require a Lab Dip approval before bulk fabric is cut. Maximum acceptable color variance: ΔE ≤ 1.5 . Go above that and your sublimation fishing jerseys ship in a color your customer won't match to your product photos.
Tool to build all of this : Techpacker or a similar Tech Pack SaaS tool generates standardized BOM, POM grading tables, and construction notes in a format factories can use directly. It also tracks version history, so there's no confusion about which spec revision is current.
Step 5: Lock Down Your Brand Visual Assets,Place Your First Sample Order in 7 Days
Most fishing apparel startups spend three weeks going back and forth with factories over logo files and label specs. Then they wait another two weeks for a sample that doesn't match what they had in mind. That's a month of momentum lost before you've sold a single shirt.
The fix is a standardized visual asset package. Build it once. Reuse it across every supplier conversation going forward.
Your Brand Visual Asset Checklist
Before you contact any fishing shirt manufacturer for samples, assemble these files:
Logo Files
- Format: AI / EPS / SVG — no JPG or PNG submissions. Factories enlarge files during print setup. Bitmaps distort. Vector files don't.
- Color specification: Pantone color codes for every element. "Dark blue" means nothing to a factory floor. "Pantone 2767 C" is non-negotiable.
Placement Specs by Position
Print Zone | Dimensions | Method |
|---|---|---|
Left chest logo | 2.5–3.5 in (6.5–9 cm) wide | Embroidery or heat transfer |
Back main graphic | 60–80% of back panel width | Sublimation (matte ink) |
Sleeve tag/badge | 1.0–1.5 in (2.5–4 cm) | Heat transfer |
For sublimation fishing jerseys aimed at tournament teams, keep the back panel graphic in low-saturation tones. Event photographers and livestream cameras handle matte finishes better than high-gloss prints.
One rule applies to every print zone: maintain a 5–10 mm bleed margin from all cut lines. Skip this and you'll pay for a second sample round when letters get trimmed at the edge.
Label and Packaging Standards
Custom performance fishing shirts cross the line from decorated blanks to real brands right here. Get these details into your Tech Pack before the first sample ships.
Woven Neck Label
- Material: 100% high-density polyester weave
- Size: 25 × 60 mm
- Edge treatment: folded or bound edges — no raw edges against skin
- Content: brand logo + size indicator, centered top to bottom
Wash Label (Heat Transfer or Satin Print)
- Required content: fiber composition (e.g., "100% Polyester" or "90% Polyester / 10% Spandex"), wash symbols, and country of origin
- Placement: side seam near hem, or inner waistline
Hang Tag
- Include a size chart (S–XXL with corresponding chest measurements). Add a scannable QR code or barcode for inventory tracking. This is critical for teams ordering fishing tournament shirts custom — they need to register gear fast.
Poly Bag Packaging
- Thickness: 0.03–0.05 mm eco OPP
- Print: single-color logo or size sticker
- Structure: self-seal or adhesive closure with a ventilation hole. This matters for air freight pressure changes on overseas shipments.
The 7-Day Sample Order SOP
Don't treat this as a rough timeline. Treat it as a project schedule with named deliverables at each stage.
Day 1 — Send Your RFQ Package to 2–3 Factories at the Same Time
Never go single-supplier on your first sample round. Send to two or three qualified manufacturers at once. One will be slower. One may misread your spec. Running parallel samples keeps your timeline intact.
Your Tech Pack submission must include:
- Front/back/side technical sketches
- Fabric spec (GSM, composition, UPF requirement)
- Complete POM size table with ±1.5 cm tolerance
- Construction notes (stitch type by seam, trim specs)
- Print files in AI/EPS/SVG + Pantone references
Email subject line tip: write "Sample request — functional fit and fabric confirmation (print final effect not required)" . This stops factories from over-investing in print finish. It keeps the first round focused on what matters: fit, fabric hand feel, and construction.
Day 2–3 — Confirm Sampling Fees and Logistics
Expect a $30–$100 per style sampling fee. The amount varies by construction complexity and region. Pay right away via PayPal, T/T, or bank transfer.
Specify your preferred courier at this stage: DHL, FedEx, or SF International . Estimated delivery time: 3–5 business days once the sample ships. Request a tracking number and keep a simple log:
Factory | Ship Date | Courier | Tracking # | ETA | Actual Receipt |
|---|---|---|---|---|---|
Factory A | Day 3 | DHL | 1234567890 | Day 7 | — |
Factory B | Day 4 | FedEx | 0987654321 | Day 8 | — |
This table does double duty. It tracks your current sample run and starts building supplier reliability data for future reorders.
Day 4–5 — Review 3D Renders or First Physical Photos
Some factories using CLO or Browzwear will send 3D renders before the physical sample ships. These are useful for catching major placement errors early. Don't sign off on bulk production based on a render alone, though.
Physical samples arrive — run this checklist straight away:
Dimensions : measure chest, body length, shoulder width, sleeve length — all must fall within ±1.5 cm of your POM table
Stitch density : count needle pitch — target 10–12 stitches per 3 cm on main seams, reinforced at shoulder, underarm, and side seam intersections
Print registration : confirm the logo sits within the safe print zone, at least 5 mm from cut lines
Color accuracy : compare against your Pantone reference card — acceptable delta is ΔE ≤ 1.5 for UPF fishing clothing and performance sportswear
Day 6 — Functional Self-Testing
Lab testing comes later. For your first sample, run these practical checks:
Wash test : machine wash at normal temperature, one to two cycles. Check for color bleed, pilling, logo cracking, or heat transfer delamination.
Stretch test : stretch the chest panel, hem, and cuffs by hand. Watch for seam distortion or thread breakage. This is critical for moisture wicking fishing apparel used in active casting positions.
Light transmission check : hold the shirt up to direct outdoor light. A clear hand shadow visible through the fabric on a UPF 50+ product means the factory didn't follow the fabric spec.
⚠ Common trap : Approving a sample from photos alone. Screen lighting makes fabric and color look better than they are. A shirt that looks premium on a phone screen can feel tissue-thin in person. Get a physical sample before any bulk commitment.
Day 7 — Designate Your Golden Sample and Lock Bulk Terms
Sample passes your checklist? Confirm it as your Golden Sample in writing. This exact piece becomes the production benchmark. Every bulk unit ships against it.
Document this in your purchase order:
- Fabric batch number and GSM from the approved sample
- All Pantone references as confirmed
- Stitch construction specs
- Label and packaging specs
Then pay your 30% deposit — standard T/T structure — and lock in a delivery window. For fishing apparel MOQ orders in the 100–300 piece range, standard bulk lead time runs 30–45 days from deposit receipt.
⚠ Common trap : Skipping the Golden Sample designation. No Golden Sample means factories have no fixed standard to produce against. Fabric substitution, color drift, and construction shortcuts on bulk runs become nearly impossible to dispute. You need a named, physical reference sample in your possession before bulk starts.
Three Mistakes That Push Your Timeline Back Two Weeks
Approving a screen mockup. A Canva render tells you nothing about fabric weight, seam construction, or label placement in real wear. Get a physical sample before bulk approval. No exceptions.
Logo placement outside the printable zone. Confirm the factory's cut line and print boundary before you finalize artwork. A misalignment found after the sample arrives means a second sampling round and a second fee.
No size tolerance in your contract. Write this into every purchase order: "Key dimensions within ±1.5 cm of approved Tech Pack POM table. Units outside tolerance subject to remake or per-unit deduction." Without it, you have no grounds for rejection on bulk delivery.
Step 6: Bulk Production Management and Pre-Shipment Quality Standards
Deposits paid. Golden Sample approved. Now comes the part that destroys first-time fishing apparel brands: the 30–45 days between "production started" and "container sealed."
Most quality failures don't show up at the factory gate. They build up — wrong fabric GSM locked in at cutting, color drift missed at mid-production, zipper tabs skipping on the final batch. By the time your bulk order lands stateside, the damage is done. The fix isn't hoping your factory does good work. Build a monitoring structure where problems surface with enough time to fix them.
Your Production Timeline: Node by Node
For a standard fishing apparel MOQ run of 100–500 pieces, here's the realistic breakdown:
Production Phase | Timeframe | Your Action |
|---|---|---|
Fabric prep + dye confirmation | Days 1–7 | Request lab dip approval (ΔE ≤ 1.0 under D65 light source) |
Cutting + sewing | Days 8–25 | First Piece Approval at Day 3–5 of sewing |
Sublimation print + finishing | Days 26–32 | Mid-production QC inspection at 70% completion |
Packaging + final QC | Days 33–38 | Third-party PSI (Pre-Shipment Inspection) |
Document prep + shipment | Days 39–45 | Confirm Bill of Lading release against 70% deposit |
One rule: Never let the factory self-report mid-production status. Require photo documentation at each node. That means fabric roll labels showing GSM, first-piece measurements against your POM table, and in-line stitch count on main seams. A factory that won't send photos on request is a red flag.
⚠ Q3 warning (July–September): Peak season adds 10–15 days of buffer risk — material delays (3–5 days), line congestion and rework (5–7 days), freight uncertainty (2–3 days). Targeting summer tournament season? Start production 6 weeks earlier than you think you need to.
The Hard QC Numbers for Custom Performance Fishing Shirts
Brief your third-party inspector (SGS, QIMA, or Bureau Veritas) with specific pass/fail thresholds. Write these into your inspection brief as measurable standards — not loose descriptions:
Dimensional Tolerance
- Chest, body length, sleeve length: ≤ ±1.5 cm from approved POM
- Inspection method: flat-table measurement at fixed points per your SOP — no freehand measuring
Seam Strength
- Shoulder seam and side seam tensile strength: ≥ 180 N (≈ 18 kgf)
- This covers active casting and overhead movement. Standard leisure apparel specs won't hold up for moisture wicking fishing apparel under real use conditions
Color Fastness (AATCC standard)
- Dry rub: ≥ Grade 4
- Wet rub: ≥ Grade 3.5
- Perspiration: ≥ Grade 4
- Light fastness: ≥ Grade 4
- For high-saturation sublimation fishing jerseys in tournament colorways, push wet rub to Grade 4. Salt sweat speeds up dye transfer
Functional Hardware
- Zippers: 3 full pull cycles per unit, 100% inspection
- Velcro rod-holder loops: 5–10 adhesion cycles, check for fiber pull
- Snap closures: manual tension test on every unit — zero tolerance for loose fittings
Zero-Tolerance Defect List (Major — Automatic Rejection)
- Skipped stitches or thread pulls
- Print misregistration >5 mm from approved placement
- Visible fabric holes, snags, or staining
- Color variance beyond ΔE ≤ 1.5 from your Pantone reference
Use AQL Level II (ISO 2859-1) as your sampling standard. At 300 units, that means inspecting 32 pieces — acceptable quality level 1.0 for major defects, 2.5 for minor.
Shipping, Costs, and Trade Terms
Sea freight from China to U.S. or EU ports takes 25–35 transit days . Per-unit freight cost runs $0.30–$1.00/piece depending on volume, season, and destination port. Air freight cuts that to 5–7 days but adds $3–$6 per unit. That's viable for urgent reorders or late tournament season fills — not for standard bulk runs.
For HS Code classification : knit fishing shirts file under HS 6109 , woven performance shirts under HS 6205 . Budget 10–20% of FOB value as a blended tax reserve for import duties and VAT across U.S./EU/AU markets. Confirm exact rates by country before you lock in your retail pricing model.
Trade term recommendation for first orders:
- FOB : Use this when your freight forwarder manages logistics. It keeps unit cost clean and freight transparent
- DDP : More convenient, but adds 8–12% to unit cost to cover the supplier's all-in risk. Good for Tier 1 test orders where simplicity matters more than margin
The Two Mistakes That Sink Full Containers
Skipping Pre-Shipment Inspection (PSI). A factory that passed your mid-production audit can still pack a container with bottom-of-rack units mixed in. PSI costs $150–$300. It protects a $4,000–$15,000 bulk order. Book it through QIMA or Bureau Veritas before the factory loads — not after.
Releasing the Bill of Lading before resolving defects. Once the BL is signed and released, your negotiating leverage is gone. Use a standard payment structure: 30% deposit at order confirmation, 70% after the PSI report confirms a pass. You release the balance, the factory releases the BL. Your PSI finds a defect rate above your contracted 2% threshold? Freeze the final payment. Open a formal dispute using your SGS/QIMA report as binding evidence.
The brands that scale past their first batch aren't the ones with the best designs. They're the ones who treat production like a managed process — not a waiting game.
Step 7: Price Tiers, Channel Strategy, and Fulfillment — Building the System That Pays You
Pricing is not a number. It's a channel decision.
Get your retail price wrong and you're not just losing margin. You're pushing buyers into channels that eat your brand equity and cut off your data access. Here's how to structure pricing and distribution so every tier does a specific job.
Match Each Price Band to a Channel Role
Don't price your SKUs in isolation. Price them against a channel function.
Price Band | Channel Role | Best Platform |
|---|---|---|
$29–$39 | Traffic and validation | Shopify + Amazon FBA or POD |
$49–$59 | Core margin driver | DTC independent site + B2B pre-orders |
$69–$89 | Brand authority | Tournament sponsorship + KOL collabs |
Your $29–$39 entry line exists to win clicks and test conversion — not to build a brand. Run it on Amazon FBA or tied to a POD setup like Printful. Be clear about what this tier is for: it generates data on colorways and sizing. It won't fund your business.
Your $49–$59 core tier is where custom performance fishing shirts generate real margin. Run it DTC through Shopify. Back it with Facebook and Instagram Reels content. This is also your B2B channel — bulk tournament pre-orders, guide outfitter restocks, team apparel packages. These order structures are more predictable. They need far less ad spend per dollar of revenue.
Your $69–$89 professional line works inside high-trust environments only: tournament sponsorships, co-branded sublimation fishing jerseys with recognized KOLs, and premium UPF fishing clothing positioning. Don't push this tier through Amazon. You'll lose price control fast.
Channel Priority: Economics First, Then Everything Else
Before you decide where to sell, run three filters in this exact order:
Economics — contribution margin, customer acquisition cost, channel fee structure, cannibalization risk between channels
Customer fit — where your target angler buys gear, their service expectations, geographic gaps
Operational reality — what your current supply chain can support, your tech stack integrations, your actual team capacity
Skipping step one and jumping straight to "let's be on every platform" is how first-time fishing clothing branding founders end up with $4,000 in inventory split across three channels — none of them profitable.
⚠ Rule: Launch with one SKU cluster on one channel. Run the full loop — receiving, pick, pack, ship, reconcile — before adding complexity.
Fulfillment: Lightweight Phase vs. Scale Phase
Early stage (under 300 units/month):
Use Shopify plus a local 3PL or POD fulfillment API. Hold your warehouse safety stock at 1–3 days of demand . Restock on a threshold trigger, not a calendar schedule. This keeps your cash moving instead of sitting in poly bags on a shelf.
Growth stage (300+ units/month):
Move to FBA, ShipBob, or an overseas warehouse model. Forecast in 60-day sell-through windows . Your first bulk run of 300–500 pieces fits well here. Set a safety stock floor at 15 days of average daily sales . That's enough buffer to absorb a delayed reorder without hitting a stockout.
For fishing apparel MOQ orders where you're splitting inventory across channels, use a simple rule: the first 50% of new product stock goes to your DTC site . The remaining 50% goes to wholesale partners by volume. This protects your margin and keeps your first-party data intact.
OTIF targets to hold yourself accountable:
- Retail partners: 98% on-time in-full delivery
- Own website: 95% on-time shipment
Warehouse Picks That Cut Fulfillment Cost Per Unit
Three moves that matter at small-to-mid scale:
ABC/XYZ slotting — put your top-moving SKUs in the golden pick zone: closest to packing stations, closest to main aisles. This saves 15–30 seconds per pick. That's nothing at 50 orders a day. It's critical at 300.
Bulk storage vs. pick face separation — keep case packs in reserve storage. Pull small quantities to active pick positions. This cuts travel time and reduces mispicks.
Zone Picking + consolidation scan for multi-SKU orders — this clears congestion on the pack line and drops error rates on moisture wicking fishing apparel kit orders.
Raise AOV Without Raising Ad Spend
Bundle before you discount.
A Shirt + Cap + Neck Gaiter kit priced at $75–$85 pulls a higher AOV than three separate purchases. The fulfillment cost per item also drops because everything ships in one poly mailer. Push bundles through your DTC site and B2B team apparel channel first. These buyers are already ready to purchase and open to bundles.
Tools That Run This System
Tool | Function |
|---|---|
Shopify | DTC hub and order management |
Printful / DSers API | POD or dropship fulfillment integration |
Klaviyo | Abandoned cart, size recommendation, restock email flows |
Google Merchant Center | Product feed sync for Shopping ads |
Meta Pixel / TikTok Pixel | Attribution tracking across paid channels |
⚠ Common traps to avoid: Stocking inventory before your DTC traffic is proven — this creates cash flow problems fast. Launching without a return/exchange SOP — unmanaged returns cut straight into gross margin. Over-relying on a single channel — platform policy changes and account suspensions are real. Always keep a channel mix running.
Conclusion
You've just mapped out the entire journey — from picking your niche to shipping your first order.
Here's the difference between anglers who talk about starting a brand and those who build one: they act before they feel ready.
The private label model was built for this moment. You don't need a factory, a textile engineer, or a $50,000 war chest. You need a sharp niche, a reliable UPF fishing clothing supplier , and the discipline to take one step at a time.
Start with your sample order this week. Pick one sublimation design. Choose one supplier from your shortlist. Put money down. That one decision turns months of overthinking into 7 days of real progress.
The fishing apparel market isn't too crowded — it's just full of generic. Your story, your community, your brand is something no competitor can copy.
Now close this tab and open your supplier's contact form.