Most custom fishing shirt projects stall out right here. You've got the design locked in — maybe a killer logo and a colorway you love — but the factory's asking for a tech pack. Now you're staring at a blank document with no idea where to start.
A garment specification sheet isn't just paperwork. It's the one document that decides whether your first sample comes back right or wrong.
Performance fishing shirts make this even more critical. UPF ratings, moisture-wicking fabric specs, and sublimation print placement all have to line up. A vague or incomplete tech pack leads to resample after resample — and that gets expensive fast.
This guide covers every section of the spec sheet. Each part includes real examples pulled from an actual fishing shirt build. By the end, you'll have something a factory can execute on the first try.
Draft Technical Flat Sketches & CAD Callouts
Factories don't work from inspiration — they work from instructions. Your design vision and what the custom fishing apparel factory cuts are two different things. That gap is where most first samples go wrong. Your technical flat sketches are what closes it.
A clean 2D technical flat is not a logo mockup. It's not a fashion illustration. It's a black-and-white vector drawing — no shading, no drape, no posed figures. It shows every seam, vent, pocket, and panel intersection with precision. Factories take these straight to pattern drafting. Hand them a stylized concept render instead, and expect rejection. Industry data shows illustrated files get turned back 70–75% more often than clean, drafted flats at the first-sample stage.
What Views You Need
For a performance fishing shirt like the ReefGuard Pro Jersey, one view is never enough:
Front flat — panel seams, placket, zipper track, pocket shape, hem line, cuff construction
Back flat — non-negotiable; factories can't infer the back yoke seam, mesh vent placement, or extended tail curve from the front alone
Side profile — required if you have underarm vents, angular panels, or side pockets
Collar/hood close-up — zipper garage, collar stand height, drawcord channels
Cuff breakdown — separate inset showing tab, elastic, closure, and stitch sequence
Skip the back view and your fishing shirts factory is guessing at one of the most critical panels on a fishing shirt.
CAD File Standards
Work in Adobe Illustrator at 1:4 scale . Group each view on its own. Label the base size (Size L is standard) so your silhouette proportions match the spec sheet measurements.
Line weight isn't arbitrary — it's a language:
Line Type | Weight | Purpose |
|---|---|---|
Outline/seams | 1–2 pt solid | Garment boundary, panel seams |
Topstitching | 0.5 pt dashed | Stitch rows, placket details |
Hidden seams/folds | Fine dotted | Interior construction, fold lines |
Callouts That Do the Work
Put every measurement on the vector art — not in a separate document. Each callout should be specific enough that a pattern maker has zero reasons to email you asking for clarification.
Critical callouts for a fishing shirt build:
Panel junctions : "Join panels A/B: 1 cm SA, 4-thread overlock"
Pocket dimensions : "Pocket opening: 14 cm width, 4 cm height; bartack at ends"
Vent zone : "Laser-cut vent zone; mesh backing: 100% poly, 140 gsm; finished area 10 cm × 6 cm"
Collar stand : "Collar stand height: 3.5 cm at CF; 3.0 cm at CB"
Placket topstitch : "0.5 cm from edge, 2 rows"
Fishing Shirt-Specific Details to Draw
Three construction elements are unique to performance fishing shirts. Each one needs its own callout treatment:
UV-resistant zipper track — Draw the zipper tape as a separate element from the body panel. Annotate: "Zipper: #5 coil, UV-resistant tape, color code XXX, length 68 cm CF." The UV spec must appear in the callout. Vendors use it to select the right material. Don't leave it implied.
Extended back tail — The back body should be longer than the front in your flat — make that difference clear visually. Add a dimension callout: "Back drop tail: +4 cm vs front hem." That single measurement prevents one of the most common first-sample fit errors on fishing jerseys.
Reinforced elbow patch — Draw the patch as a distinct shape on the sleeve view. Callout: "Double-layer 200 gsm woven overlay; 10 cm × 16 cm; perimeter topstitch 0.5 cm from edge; bartack at corners."
Name Your Files Right
File naming matters more than most people expect. Use production-specific language in every file name and layer label:
"ReefGuard Pro Jersey v2.1 – apparel CAD sketch fishing shirt – technical flats (front/back/side + collar/cuff details)"
Cut phrases like "concept art" or "fashion illustration" from your file names. To a factory, those words signal the file isn't production-ready — because it isn't.
Build the Fishing Shirt Bill of Materials
The BOM is where vague intentions meet hard consequences. Every component your fishing shirt uses — shell fabric, mesh vent panels, zipper, snaps, thread, labels, packaging — needs its own row in this table. No documentation means the factory makes its own call. And factory substitutions on a performance fishing shirt are never minor. A generic coil zipper corrodes in saltwater. The wrong GSM on a vent panel kills breathability. These are real problems. They happen when a BOM is thin.
Structure your BOM as a hierarchical table. Each row locks nine fields: component, fiber content, GSM/spec, width or size, color code, custom fishing shirts supplier and article number, quantity per garment, placement, and any special performance requirement. Every field matters. Leave one blank and you've handed the factory a decision that was yours to make.
The Fields That Prevent Resamples
Take the ReefGuard Pro Jersey as an example. The shell fabric row reads: 92% polyester / 8% spandex, 150 gsm, 58" cuttable width, UPF 50+ treated, quick-dry finish, confirmed Pantone shade code. Not "performance polyester." Not "moisture-wicking fabric." Exact composition, exact weight, exact finish. That level of detail is what keeps samples on track.
The trims column is where most fishing shirt BOMs fall apart:
Front zipper : YKK #5 Vislon, corrosion-resistant coating, 68 cm, specify pull type and Pantone match — not "standard zipper"
Snaps : metal snaps with ASTM B117 salt-spray resistance, minimum 72 hours — marine exposure is non-negotiable
Drawcord : elasticized, 6mm diameter, silicone end caps, placement at hood or hem as designed
Mesh vent panels : 100% polyester, 140 gsm, article number confirmed, placement mapped to CAD callout
Thread gets its own row too. Use polyester or UV-coated polyester, sized by stitch type. Match the color to the shell fabric unless topstitch contrast is part of your design intent.
Common mistake : Entering "performance fabric" or "standard zipper" anywhere in this document. A factory cannot source, confirm, or quality-check against vague terms like those. They mean nothing on a production floor.
One more field to add before sending this to any fishing shirts supplier: wastage allowance. For woven shell fabrics, budget 12–15% over the calculated consumption per garment. For mesh and trims, budget 5–8%. It looks like a small line item. But it's what stops a production halt when the roll runs short.
Define Fabric Specifications & Performance Metrics
Fabric specs are where your fishing shirt earns its price point — or falls apart on the water. Sometimes that's a physical failure, not just a figure of speech.
This section of your tech pack isn't about listing materials. You're giving a fishing apparel factory and a testing lab a set of measurable, verifiable targets. Every value needs a number, a unit, and a test standard. Confirm all of it before a single bulk roll gets cut. Anything less is a guess.
The Core Performance Metrics Table
For the ReefGuard Pro Jersey, lock in these fabric parameters:
Metric | Target Value | Test Standard |
|---|---|---|
GSM (fabric weight) | 162 g/m² | ASTM D3776 |
Fiber content | 92% nylon / 8% spandex | AATCC 20A |
UPF rating | UPF 55 (50+ minimum on all colors) | AS/NZS 4399:2017 |
Moisture wicking | Vertical wicking ≥15 cm in 30 min | AATCC 197 |
Quick-dry time | ≤28 min from 100% saturation | Brand protocol (ISO 6330 adapted) |
Air permeability | 350 L/m²/s at 100 Pa | ISO 9237 |
Saltwater colorfastness | ≥4 after 50 cycles in 3.5% NaCl | AATCC 61 2A modified |
Pilling resistance | Grade ≥4 after 5,000 rub cycles | ISO 12945-2 |
Wash shrinkage | ≤3% length and width | AATCC 135 |
Stretch & recovery | ≥25% elongation; ≥90% recovery | ISO 20932 |
Tear strength | Warp 20 N / Weft 18 N | ASTM D1424 |
Bursting strength | ≥300 kPa | ASTM D3787 |
The right GSM range for performance fishing shirts is 140–170 g/m² . Go lighter and you lose opacity and UPF coverage. Go heavier and the shirt gets clammy in humid conditions. At 162 g/m², you hit the sweet spot for a long-sleeve sun shirt with 4-way stretch.
UPF 50+: The Metric Most Brands Get Wrong
UPF is not a fiber property. It's not automatic just because your fabric is polyester. Six factors combine to produce a UPF rating: fiber type, yarn diameter, weave density, fabric thickness, colorant, and applied finishes. Plus, sublimation printing changes that rating after the fact.
Two rules belong in every tech pack:
Require third-party testing. Your spec line should read: "Fishing apparel Supplier must submit AS/NZS 4399:2017 UPF test report from an accredited lab (SGS, Intertek, or equivalent) for each fabric quality and color group prior to bulk approval." Internal mill certificates without a named method and lab don't count.
Re-test after all finishing steps. Silicone softeners, optical brighteners, and heavy sublimation ink coverage all reduce fabric porosity and UV transmission. Test the finished, printed fabric — not the greige.
Warning : Sublimation-ready polyester does not guarantee UPF 50+. Pull test reports on the lightest colorway and the print-heaviest colorway. Those are your two worst-case scenarios.
Saltwater and Sweat Durability
This spec is what separates a fishing shirt from a generic athletic tee. Your tech pack needs colorfastness testing in 3.5% NaCl saline solution — not plain water. Run AATCC 61 2A accelerated wash cycles to simulate 50 real-world launderings. The minimum passing grade is ≥4 for both color change and staining.
Any coating or laminate on the fabric must show zero delamination or tackiness after the test. Add a one-week ambient rest period before you check results.
Also add AATCC 15 perspiration testing for designs with dark or neon colorways. High UV, salt, and sweat hit fabric integrity from three directions at once. Spec all three together.
Your Mill Screening Checklist
Before approving any fabric sample, run it against this list. A mill that can't produce test reports for every line item isn't worth your time. Move on.
GSM: 140–170 g/m² (ASTM D3776) — reject outside range
UPF: ≥50+ on lightest color, AS/NZS 4399:2017 — require accredited lab report
Wicking: AATCC 197 ≥15 cm in 30 min
Quick-dry: ≤30 min from 100% pick-up (brand protocol)
Colorfastness to light: ≥4–5 (ISO 105-B02)
Saltwater wash: AATCC 61 2A in 3.5% NaCl, 50 cycles, ≥4
Pilling: ISO 12945-2 ≥4
Shrinkage: AATCC 135 ≤3% both directions
Air permeability: ISO 9237, 200–600 L/m²/s depending on ventilation design
Each of these is a go/no-go gate. They aren't aspirational targets — they're the floor. A fabric that clears every one of them is a fabric your customers can fish in for three seasons without complaints.
Set the Garment Measurement & Size Grading Chart
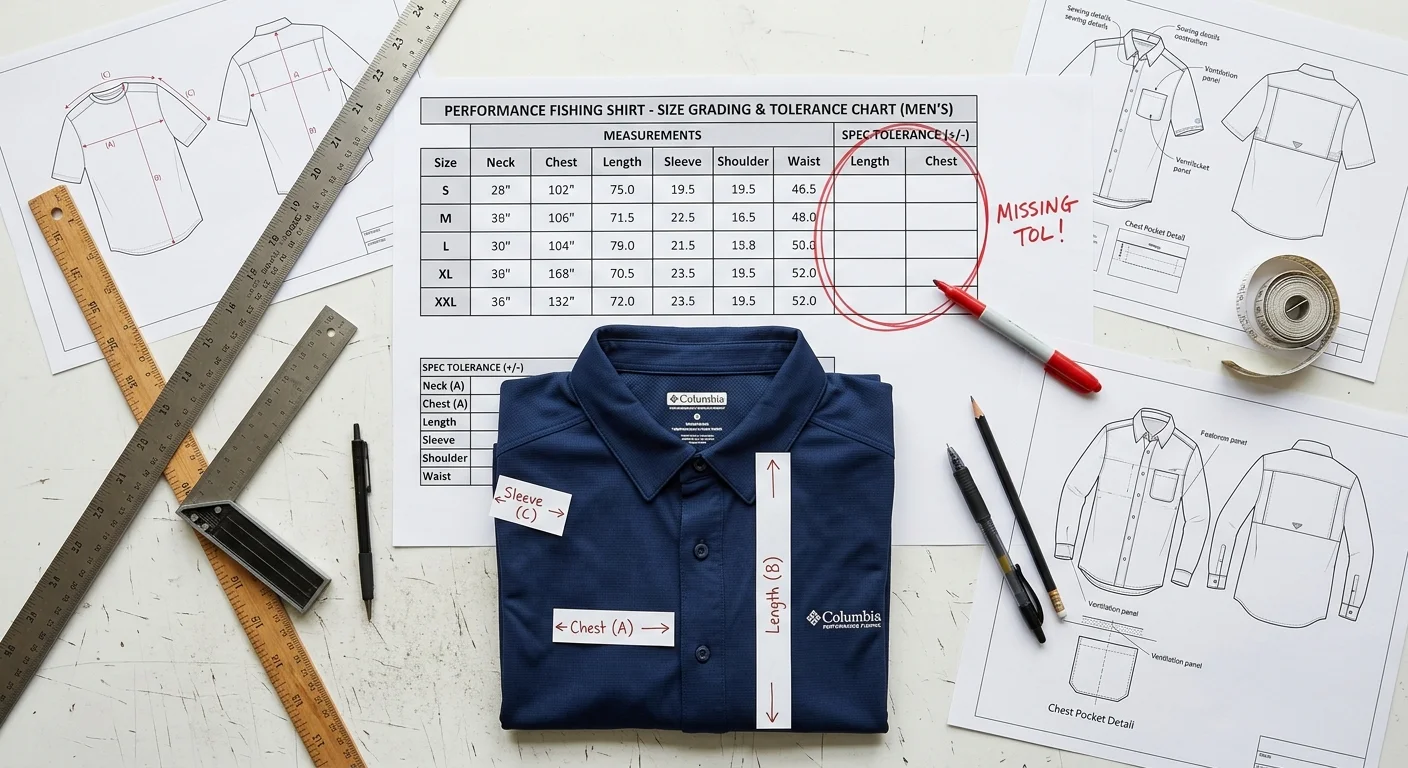
Fit disputes are the most expensive problem in apparel production. They happen when spec sheets have measurements but no tolerances — or when grading rules are assumed instead of written out. A sleeve that's 0.5" too short cuts your casting range. A hem that rides up leaves your lower back exposed to sun. That missing detail costs real money.
Define Your Points of Measurement First
Every measurement on your spec sheet needs a POM code, a precise location, and a measurement method. No guesswork. No interpretation.
For the ReefGuard Pro Jersey, lock these POMs into your garment specification sheet:
P01 – Chest width : Measure flat, front only, 1" below armhole seam, edge to edge
P02 – Body length (HPS to hem) : From high point shoulder straight down to finished hem
P03 – Across shoulder : Back only, outer seam to outer seam
P04 – Sleeve length : Shoulder seam along top sleeve to cuff edge
P05 – Cuff opening : Flat, across finished sleeve opening
P06 – Collar circumference : Along stitching line at buttoned position
P07 – Placket width : Edge to edge, perpendicular to CF at mid-placket
P08 – Hem sweep : Side seam to side seam across bottom edge
Fishing Shirt Size Grading Chart — Base Size L
These are your anchor numbers. Everything else grades off them.
POM | Base (Size L) | Grade Per Size | Tolerance |
|---|---|---|---|
Chest width | 24.0" | ±1.25" | ±0.125" |
Body length | 30.0" | ±0.75" | ±0.125" |
Across shoulder | 19.0" | ±0.5" | ±0.125" |
Sleeve length | 25.0" | ±0.75" | ±0.125" |
Cuff opening | 4.75" | ±0.25" | ±0.0625" |
Collar circumference | 17.0" | ±0.5" | ±0.0625" |
Placket width | 1.50" | none | ±0.0625" |
Hem sweep | 26.0" | ±1.0" | ±0.125" |
Look at the hem sweep. Standard outdoor shirts run 24.5" at size L. The ReefGuard spec goes to 26.0". That extra +1.5" of ease stops the shirt from riding up on a forward cast or a paddle stroke. Build that into your base from the start — not as an add-on later.
Full Size Run — Expanded Grid
Size | Chest | Body Length | Cuff Opening | Hem Sweep |
|---|---|---|---|---|
S | 21.5" | 28.5" | 4.25" | 24.0" |
M | 22.75" | 29.25" | 4.50" | 25.0" |
L | 24.0" | 30.0" | 4.75" | 26.0" |
XL | 25.25" | 30.75" | 5.00" | 27.0" |
2XL | 26.5" | 31.5" | 5.25" | 28.0" |
Two Fishing-Specific Adjustments That Don't Show in the Grid
Back yoke depth : Add +0.5" to your standard yoke depth at size L (baseline 7.5" → 8.0" HPS to yoke seam). This gives you better casting mobility at the shoulder. It won't appear as a standalone POM in the grade — so write it in as an engineering note on your spec sheet so it doesn't get missed.
Tolerances on critical seams : Collar circumference, cuff opening, and placket width each carry ±0.0625" tolerance. That's 1/16". It's tight — and that's the point. QC reviews show that missing or vague tolerances cause most fit disputes. Collar fit controls UV coverage. Cuff sizing controls sun protection at the wrist. On a performance fishing shirt, vague specs aren't an option.
Common mistake : Submitting a size grading chart with no tolerance columns. Factories treat missing tolerances as ±0.5" or wider. On a fishing shirt, that error shows up the moment you're out on the water.
Detail Artwork Placement, Colorway & Print Methods
Skip the placement spec sheet and you're paying for resamples. Here's the discipline that stops that from happening.
Every artwork element on the ReefGuard Pro Jersey locks down three things: a fixed position, a maximum size, and a specified print method. No exceptions. Factories don't improvise well with artwork. On a performance fishing shirt, a logo that drifts 1.5" off-center or a sublimation panel with no bleed spec isn't a small problem. It's a resample.
Placement Reference Table (Base Size L)
Location | Distance Reference | Max Size (W × H) | Print Method |
|---|---|---|---|
Center chest | 3–4" below front collar seam | 11–12" × 13–14" | Sublimation panel or screen print |
Left chest logo | 7–9" down from shoulder; ~3.5" from CF | 3.5–4" × 3–4" | Screen print / heat transfer |
Full front AOP | Seam-to-seam body panel | Full template | Sublimation AOP |
Back yoke sponsor | 1–1.5" below back neck seam | 10–12" × 4–5" | Sublimation or screen print |
Left sleeve logo | ¼ sleeve length up from cuff | 2–2.5" diameter | Heat transfer / screen print |
Right sleeve text | Match left sleeve vertical ref | Up to 10–12" × 2" | Screen print / heat transfer |
One non-negotiable rule : keep ≥1" clearance from all seams on any localized print. Go tighter and you risk distortion at the stitch line.
Colorway Spec: Pantone FHI, Not RGB
For polyester shell fabrics, use Pantone FHI TCX codes — not RGB values, not hex. For coated transfer media, use TPG references .
Your tech pack needs to define each colorway clearly:
Base shell color : e.g., Pantone 2965 TCX – Deep Sea Blue
Logo spot colors : individual TCX/TPG codes per element
Screen print : cap at ≤6 spot colors per location for cost-efficient runs
Sublimation : provide both CMYK build and Pantone target; specify ΔE ≤ 2–3 tolerance between strike-off and Pantone reference
Here's something worth building into your spec: deeper, high-chroma colors — navy blues, forest greens — hold up far better under long UV exposure than pastel or neon tones. On sublimated polyester, expect visible fade after 100–150 hours of direct tropical sun . DTG on cotton blends fades 3× faster under the same conditions. That's not a side note — it's a spec decision.
Print Method Selection
Method | Best For | Key Constraint |
|---|---|---|
Sublimation | Full AOP, fish-scale patterns, gradients | 100% polyester only; light base colors |
Screen print | Solid logos, sponsor blocks | ≤6 spot colors; no fine gradients |
Heat transfer | Small sleeve logos, low-volume runs | Max ~10" × 4"; edge-lift risk on high-flex zones |
DTG | Photo-detail artwork on cotton | Not suitable for primary saltwater garments |
Sublimation Tech Pack Specifics
Full AOP sublimation takes more than a high-res file. Your tech pack must include:
Separate pattern pieces for front, back, sleeves, collar, and side panels
≥0.125" bleed beyond all cut lines on every piece
Tile alignment origin for repeating patterns (e.g., center front); acceptable seam mismatch <2% of pattern unit height
No logos or text crossing seams — keep all critical art ≥0.25–0.5" inside the seam allowance
Strike-off swatch approval per fabric base before bulk print
File delivery standard : Vector (.AI / .EPS) for logos and text. High-res PNG or PDF with transparent background for AOP panels. All raster files at 300 DPI minimum, CMYK color mode. Artboard: 14" × 16" with key elements inside a 12" × 14" safe zone.
Map Seam Construction & Stitching Specifications
Seam specs are where fishing shirts hold together — or fall apart. After a season of saltwater, sun, and hard use, that difference shows up fast.
"Fishing shirts Factory standard" is not a seam specification. It's a cop-out. Four variables drive seam performance: stitch type, thread strength, seam allowance, and SPI. Leave any one unspecified and you hand that production call to someone who has never worn your shirt on the water.
The Zone-Based Stitch Matrix
Different panels take different stress. Each zone needs its own spec.
Zone | Stitch Type | SPI | Seam Allowance | Finish |
|---|---|---|---|---|
Body panels | 301 lockstitch | 10–11 | 0.25" | Flat-felled |
Underarm / vents | 504 overlock | 12 | 0.125" | Trimmed + topstitched |
Sleeve / hem | 406 coverstitch | 9–10 | 0.375" | Raw edge fold |
Zipper placket | 301 + bar tack | 8 | 0.5" | Reinforced |
This matrix follows ASTM D6193 — the base standard for stitch and seam classification in sewn garments. Name it in your tech pack. It gives factories a shared vocabulary instead of room to guess.
Marine-Specific Construction Rules
Four specs separate a fishing shirt from a generic athletic tee. All four need to appear as clear, written callouts — not assumptions:
UV-resistant polyester thread on all exposed seams. Not implied. Written.
Flatlock construction at all skin-contact zones (underarm, collar interior, cuff lining). This keeps bulk down and cuts out the chafe that hits around hour six of a tournament.
Bonded seam tape on shoulder stress lines and chafe-prone zones. It blocks water ingress and stops abrasion failure at the same time.
3× bar tacks minimum at every saltwater snap attachment and high-load point. Pocket edges need double-needle chainstitch anywhere abrasion is a regular issue.
One more rule — write this one in word for word: seam ends must be backstitched or overstitched at least 1 inch , with thread tails trimmed to ¼ inch maximum . It's a short line in your spec. It stops a lot of unraveling down the road.
Common mistake : Specifying stitch type without SPI. A 301 lockstitch at 8 SPI performs in a different way than at 11 SPI — this gap gets bigger on 150 gsm stretch fabric. Both values belong in the spec, every time.
Establish Functional Testing Standards & QC Protocols
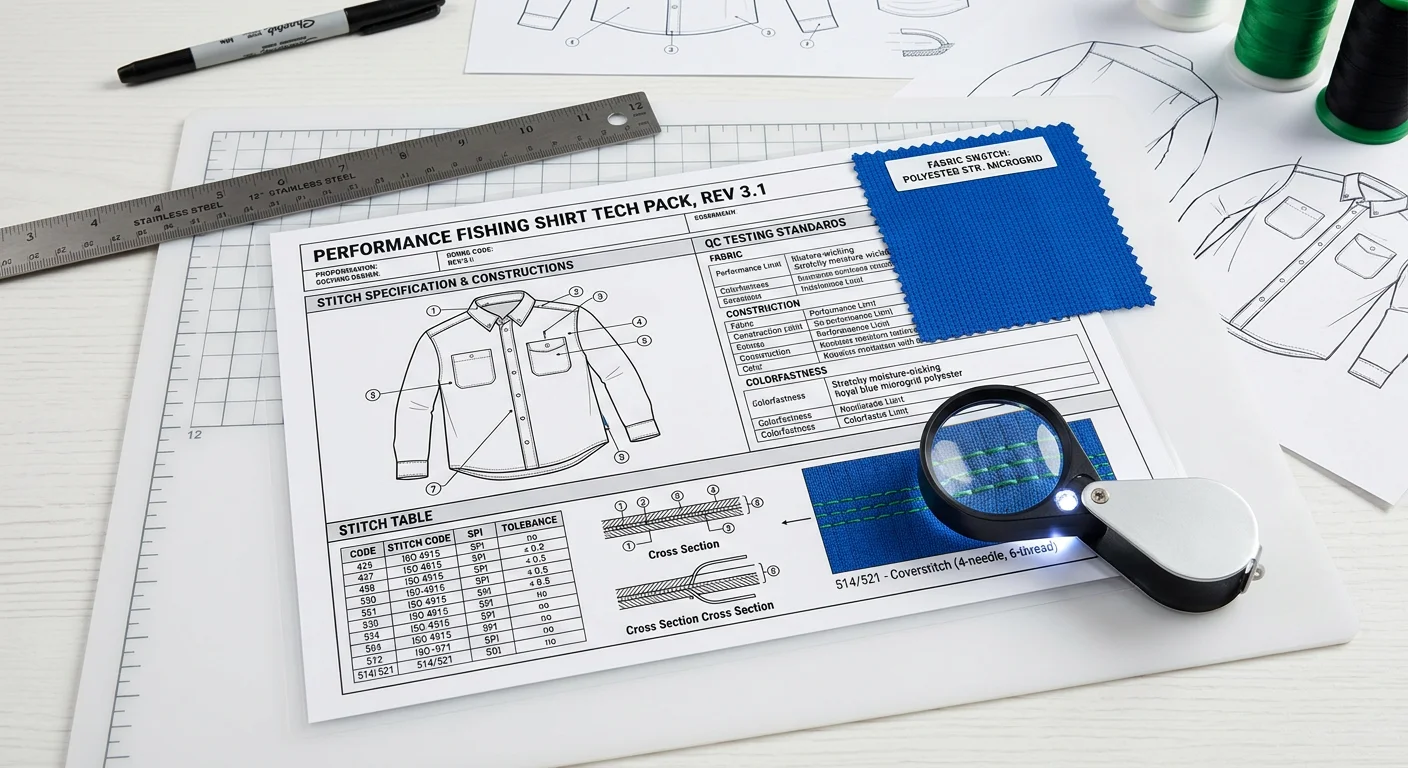
A tech pack without testing standards is a wish list. Factories will ship garments that meet their definition of "UV protective" and "quick-dry" — not yours. You need to define every performance target in measurable, auditable terms.
Here's the rule: every functional claim your fishing shirt makes needs three things. A number behind it. A test method attached to it. A pass/fail threshold written into your QC SOP.
UPF Compliance: Third-Party Reports Required
Internal mill certificates don't count. Your tech pack must require a third-party lab report — SGS, Intertek, or equivalent. It must reference AS/NZS 4399 for UPF classification and ASTM D6603 for UV protective textile labeling.
Two non-negotiable protocol rules:
Test the finished, printed garment — not greige fabric. Colorants, wicking finishes, and sublimation ink all shift UV transmission after processing.
Attach the original lab report to the PPI (Pre-Production Inspection) pack , linked to the style code. No report, no bulk approval.
Minimum passing threshold: UPF ≥50 , blocking ≥98% UVR.
Moisture Performance Specs
Generic "quick-dry" claims fail third-party audits. Lock in these numbers instead:
Vertical wicking : ≥4.5 cm rise in 15 minutes (warp and weft average). Reject any lot where mean height falls below threshold or coefficient of variation exceeds 15%.
MVTR : ≥500 g/m²/24h (ASTM E96 Procedure B). You must specify test temperature, humidity, fabric orientation, and pre-conditioning time. All four fields, every time.
During-production check : At DPI, use a Moisture Management Tester (MMT) across roll width. Reject any roll where edge-to-center wicking difference exceeds 10%.
Colorfastness & Durability Testing
Test | Method | Minimum Grade |
|---|---|---|
Wash fastness | ISO 105 C06 A2S, 40°C | ≥4 grey scale |
Dry crocking | 10 rubs, 9N force, 10 cm path | ≤4 staining |
Wet crocking | Same protocol, wetted cloth | ≥3–4 grey scale |
Light fastness | ISO 105 B02 xenon arc | ≥4 |
Perspiration | ISO 105 E04 | ≥4.5 |
Saltwater | ISO 105 E02 | ≥4.5 |
Write every numeric grade into your fabric performance spec sheet. "Colorfast" as a standalone claim means nothing on a production floor. It fails on audit too.
Defect Classification & AQL Limits
Three defect tiers. Each has a hard limit.
Critical defects — sharp objects, missing legal care labels, mold, non-compliant flammability: AQL 0 . One single critical defect triggers full lot rejection.
Major defects — misaligned prints, open seams, skipped stitches in stress zones, GSM outside ±5% of spec, measurements beyond tolerance: AQL 2.5 .
Minor defects — thread tails under 5mm, packaging wrinkles, crooked internal labels: AQL 4.0 .
Sampling follows ISO 2859-1 / ANSI/ASQ Z1.4 , Normal Inspection Level II. For a lot of 501–1,200 units, pull 80 garments. At AQL 2.5: pass at ≤7 defective units, fail at ≥8.
Four-Point Fabric Grading
Before any bulk roll gets cut, run four-point fabric grading :
Score each surface defect 1–4 points based on length and severity. Maximum 4 points per defect, regardless of size.
Premium export grade : ≤20 points per 100 square yards
Standard commercial grade : 21–40 points
Reject/rework : >40 points
Flag holes, coating streaks, stains, and missed stitches. For waterproof membrane panels, add AOI (Automated Optical Inspection). It catches pinholes that visual checks miss.
Inspection Checkpoint Map
Stage | What to Verify |
|---|---|
PPI | Chemical certificates, RSL compliance, UPF lab report, wicking + colorfastness + shrinkage reports |
DPI | MMT roll-width uniformity, GSM within ±5%, construction spot-checks |
PSI | Spray rating (AATCC 22), oil repellency (AATCC 118), four-point visual grading, AQL final inspection |
Warning : Tech packs that skip explicit UPF values and wicking specs push factories toward vague "UV protection" and "quick-dry" marketing language. Audit firms test those garments against AS/NZS 4399 or AATCC 197. Claims fail. Goods get downgraded or relabeled — at your cost. Quantifiable targets in your SOP are what make functional claims enforceable.
Specify Label, Hang Tag & Packaging Requirements
Labels get treated like an afterthought. They're not. A garment can pass every performance test and still fail at the factory. Why? The neck label spec was vague. The hang tag artwork wasn't approved before bulk. Nobody told the packer how to fold the shirt. Document every detail here — or pay to fix it later.
Label Matrix: Five Tags, Zero Ambiguity
The ReefGuard Pro Jersey carries five distinct label types. Each one has a fixed spec.
Label Type | Key Content | Attachment | Position |
|---|---|---|---|
Inner Neck (main) | Brand, size, fiber content, UPF 50+ claim, country of origin, care icons | Center fold, sewn into back neck seam | Center back neck, top edge 6 mm below seam |
Care label | "Rinse in fresh water after use. Machine wash cold 30°C. No bleach. Tumble dry low. Do not iron print. No fabric softener." | Overlock into left side seam | 10–12 cm above hem, facing body |
Size label | Alpha size, consistent with master size chart | Piggyback on main neck label | 2–3 mm below main label |
Performance label | "UPF 50+ — blocks ≥98% UV" + test method reference | Heat-transfer or small woven tag | Inner lower left panel, 3–4 cm above hem |
Hang tag | SKU, EAN barcode, batch/lot, size, QR code to digital care guide, brand name | Rope string through front placket loop | Left shoulder seam, 6–8 cm drop |
Inner Neck Label: Material Matters on a Fishing Shirt
Standard woven damask labels trap salt crystals against skin. For the ReefGuard, spec a printed micro-mesh patch instead. It's soft, breathable, and won't chafe after six hours in saltwater sun. Print onto the micro-mesh panel.
This label must carry the UPF 50+ claim alongside fiber content. Your hang tag may show partial fiber content only. US FTC rules then require a clear disclosure: "See label for the product's full fiber content" — printed no smaller than the fiber name text, placed near the first fiber mention.
List fibers in descending order by weight. Fibers below 5% don't need disclosure. Use generic names only — unless a trademark goes with the generic term.
Care Label: Fishing-Specific Language
Generic sportswear care copy doesn't cover saltwater garments. Write it in plain, clear terms:
"Rinse in fresh water after saltwater use. Machine wash cold 30°C. Do not bleach. Tumble dry low. Do not iron print. Skip fabric softener — it breaks down the moisture-wicking finish."
Use ISO care symbols alongside the text. Attach the label via overlock into the left side seam. This keeps it flat and stops it from shifting wash to wash.
Hang Tag: Spec the Physical Details
Vague hang tag briefs lead to artwork rejections and reprint costs. Lock down every field:
Board : FSC-certified recycled kraft, 400–600 gsm, matte lamination
Dimensions : 50 × 90 mm, rounded corners, 3 mm radius
Hole : 3–4 mm diameter, ≥5 mm from edge
Attachment : rope string through the dedicated placket loop — never through mesh panels
Barcode : EAN-13, tested for scan reliability under standard retail lighting
QR code : links to digital reef-safe care guide; test scan before bulk approval
Regulatory note : full fiber content not listed on the hang tag? Include the FTC-required disclosure statement
Approve digital mockup → physical sample on garment → sign off before bulk cutting starts. Order hang tags 2–3 weeks before bulk cut date .
Packaging Spec: Polybag to Carton
Polybag
Material: recycled LDPE, 80 microns thickness
Fold method: front-in fold, sleeves folded backward, final folded width 24 cm; size label facing up inside bag
Closure: adhesive flap
Print: suffocation warning text (language per destination market), size/SKU sticker at top-right corner, 15 mm from edge
Optional: reef-safe or recyclable icon if brand positioning supports it
Master carton
Max 40 pcs per carton — keeps weight under 18–20 kg for easy handling
5-layer double-wall corrugated board; moisture-resistant inner liner for ocean freight
Carton marks on two sides and top: PO#, style code, size range, color, destination port, carton #/total
Desiccant packets inside each carton for long transit legs
Common mistake : Passing packaging instructions by word of mouth or a quick email — nothing written in the tech pack. The folding method, sticker placement, and carton assortment ratios need to be in the spec. Leave them out, and the packing team copies whatever they did on the last job. That job wasn't yours.
Compile Production Notes & Finalize the Tech Pack Template
All the work from the previous eight sections comes down to one moment: the handoff. Get the final bundle wrong, and nothing built before it matters.
The rule is simple — one tech pack per style, one per colorway . The ReefGuard Pro Jersey in Deep Sea Blue and Coastal Slate? That's two separate packs. Each fishing shirts factory contact receives one clear instruction set. No version mix-ups. No color cross-contamination during sampling.
What Goes Into the Final Bundle
Before export, check that every element is present:
Front/back CAD flats with all callouts annotated
BOM covering fabric, trims, thread, labels, and artwork references
Measurement chart with tolerances locked and signed off
Colorway page with Pantone FHI TCX codes labeled by name
Print/graphic files with placement dimensions and bleed confirmed
Revision history — move from v1.0 to v1.1 after the first sample review; log every change
UPF, wicking, and colorfastness certificates included in the submission package
Export Format
File | Format |
|---|---|
Tech pack | Layered PDF |
BOM + measurements | Editable .xlsx |
CAD flats | .ai vector |
Artwork | Separate print ZIP |
Name every file using this format: Brand_StyleCode_Color_v#_YYYYMMDD . This structure makes every sample round easy to trace. No follow-up emails needed.
Conclusion
A tech pack isn't paperwork — it's the difference between a fishing clothing factory that gets it and a factory that guesses.
You now have the full framework. It covers CAD sketches, your garment specification sheet , seam construction details, UPF testing standards, and packaging requirements. Nine sections. Zero ambiguity. That's what separates a first sample that fits from three rounds of revision costs.
Here's what most sourcing guides won't tell you: factories aren't mind readers. Define your moisture-wicking fabric specs , colorways, and print method expectations upfront. Be specific. This cuts down the time and money lost to preventable mistakes later.
So don't sit on this. Open a blank document today. Work through each section using the template as your guide. Then send that first RFQ with confidence.
Your fishing shirt brand doesn't start when the samples arrive. It starts the moment your tech pack is complete.